
Welcome to Netron. Takeaway & Delivery Restaurants Platform.
Go to app.netroneats.com
1. Menu Guide
In this guide we will show you The Menu & Menu Groups section in the Netron platform. Netron offers a robust menu configuration system. Create and manage multiple menus that are easily accessible across various sales channels, including POS systems, online ordering, kiosk systems, and third-party delivery services. Assign products to menu groups within the menus with flexibility, ensuring they appear in multiple relevant menu groups.Let’s get started with Menu & Menu Groups and show you how to configure these settings.
2. Accessing Menu Page
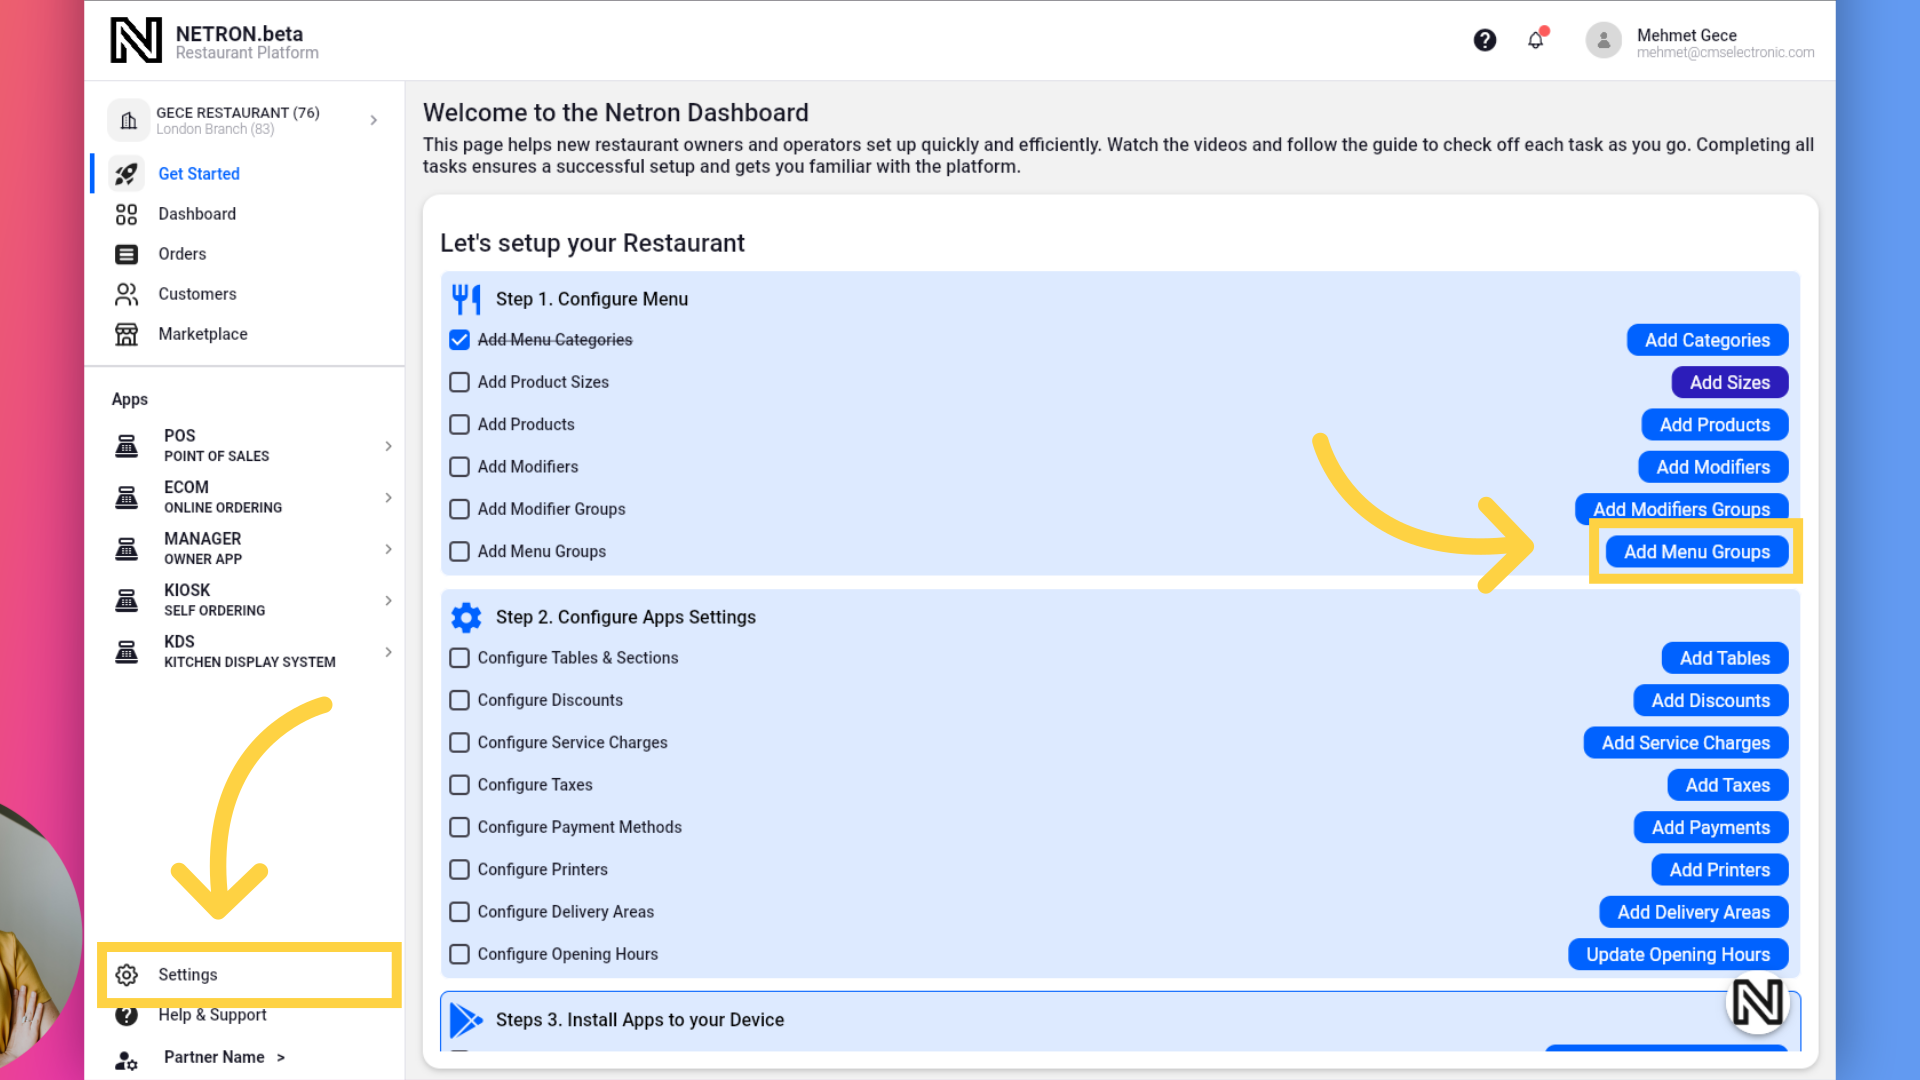
There are two ways to access the Menus page. One is by clicking Settings > Menus. The other is by going to Get Started and clicking the Add Menu Groups button.
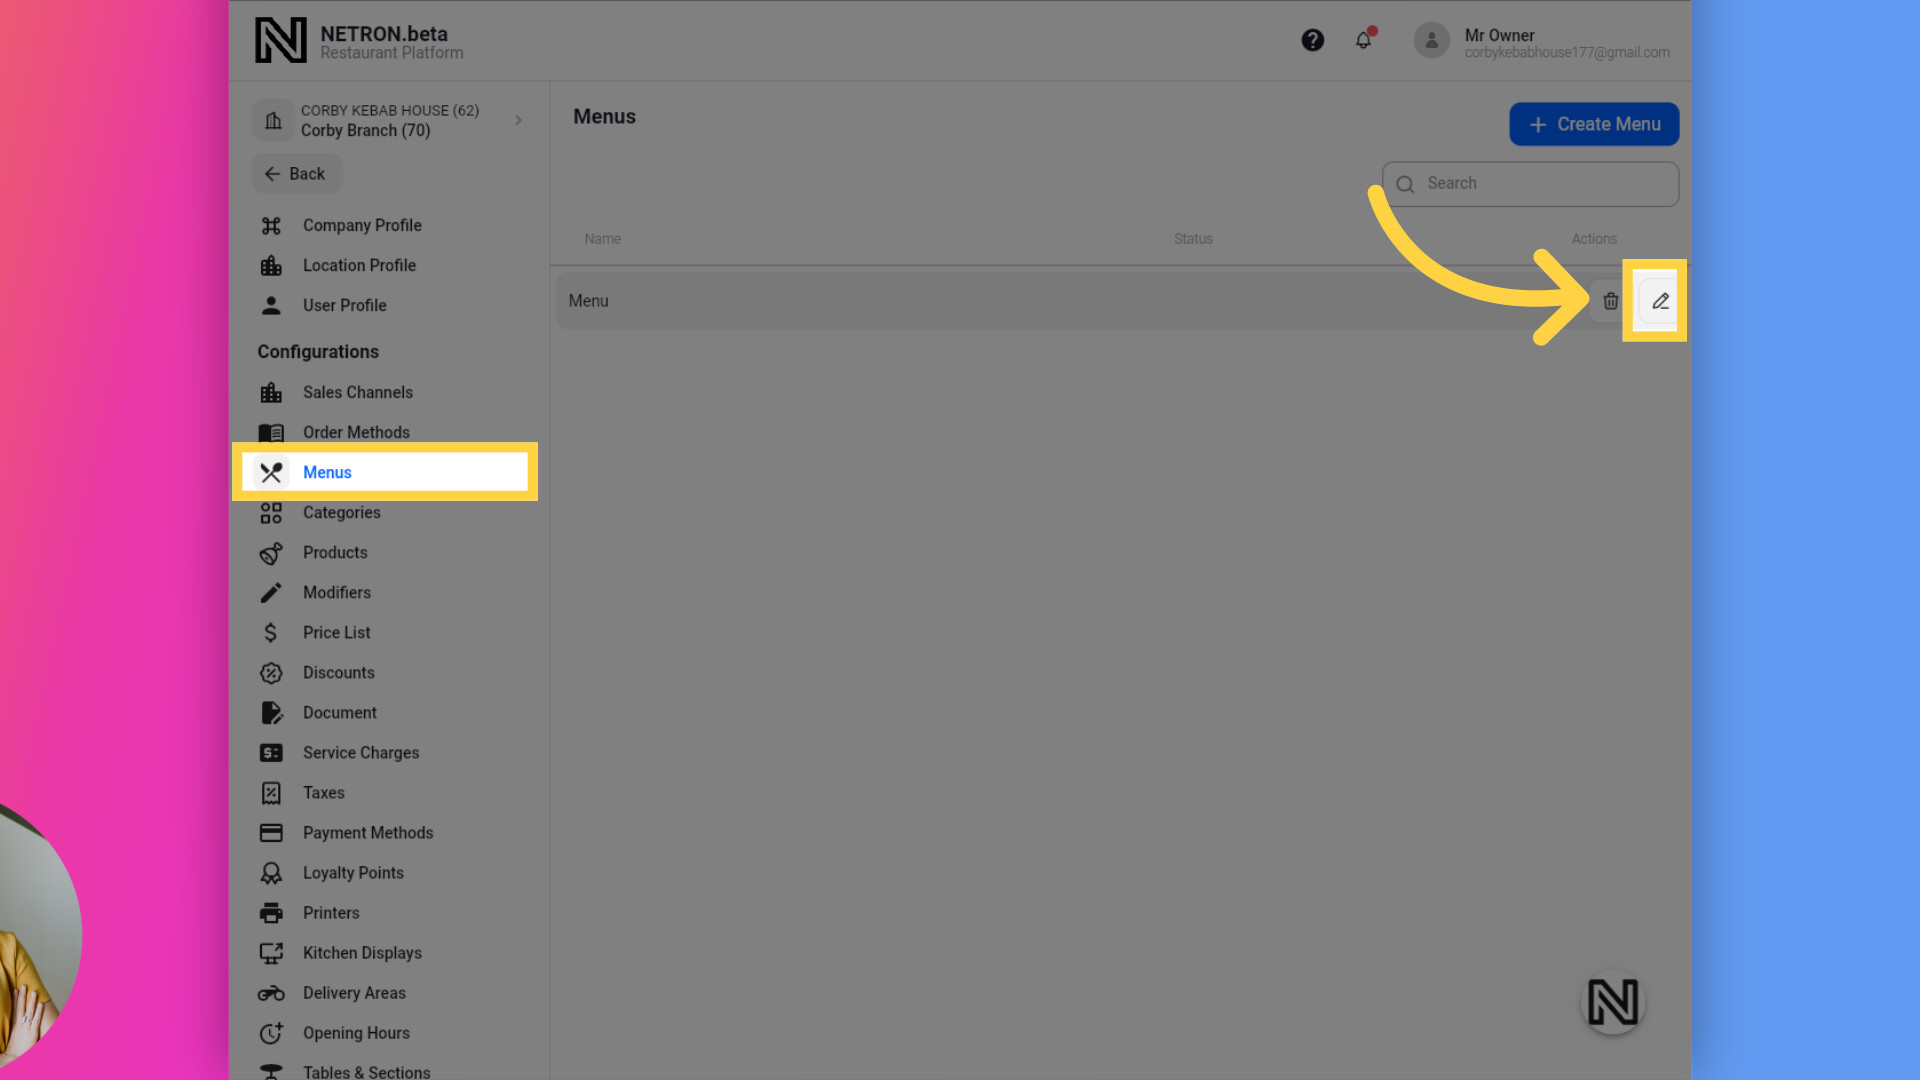
3. Menu Page List View
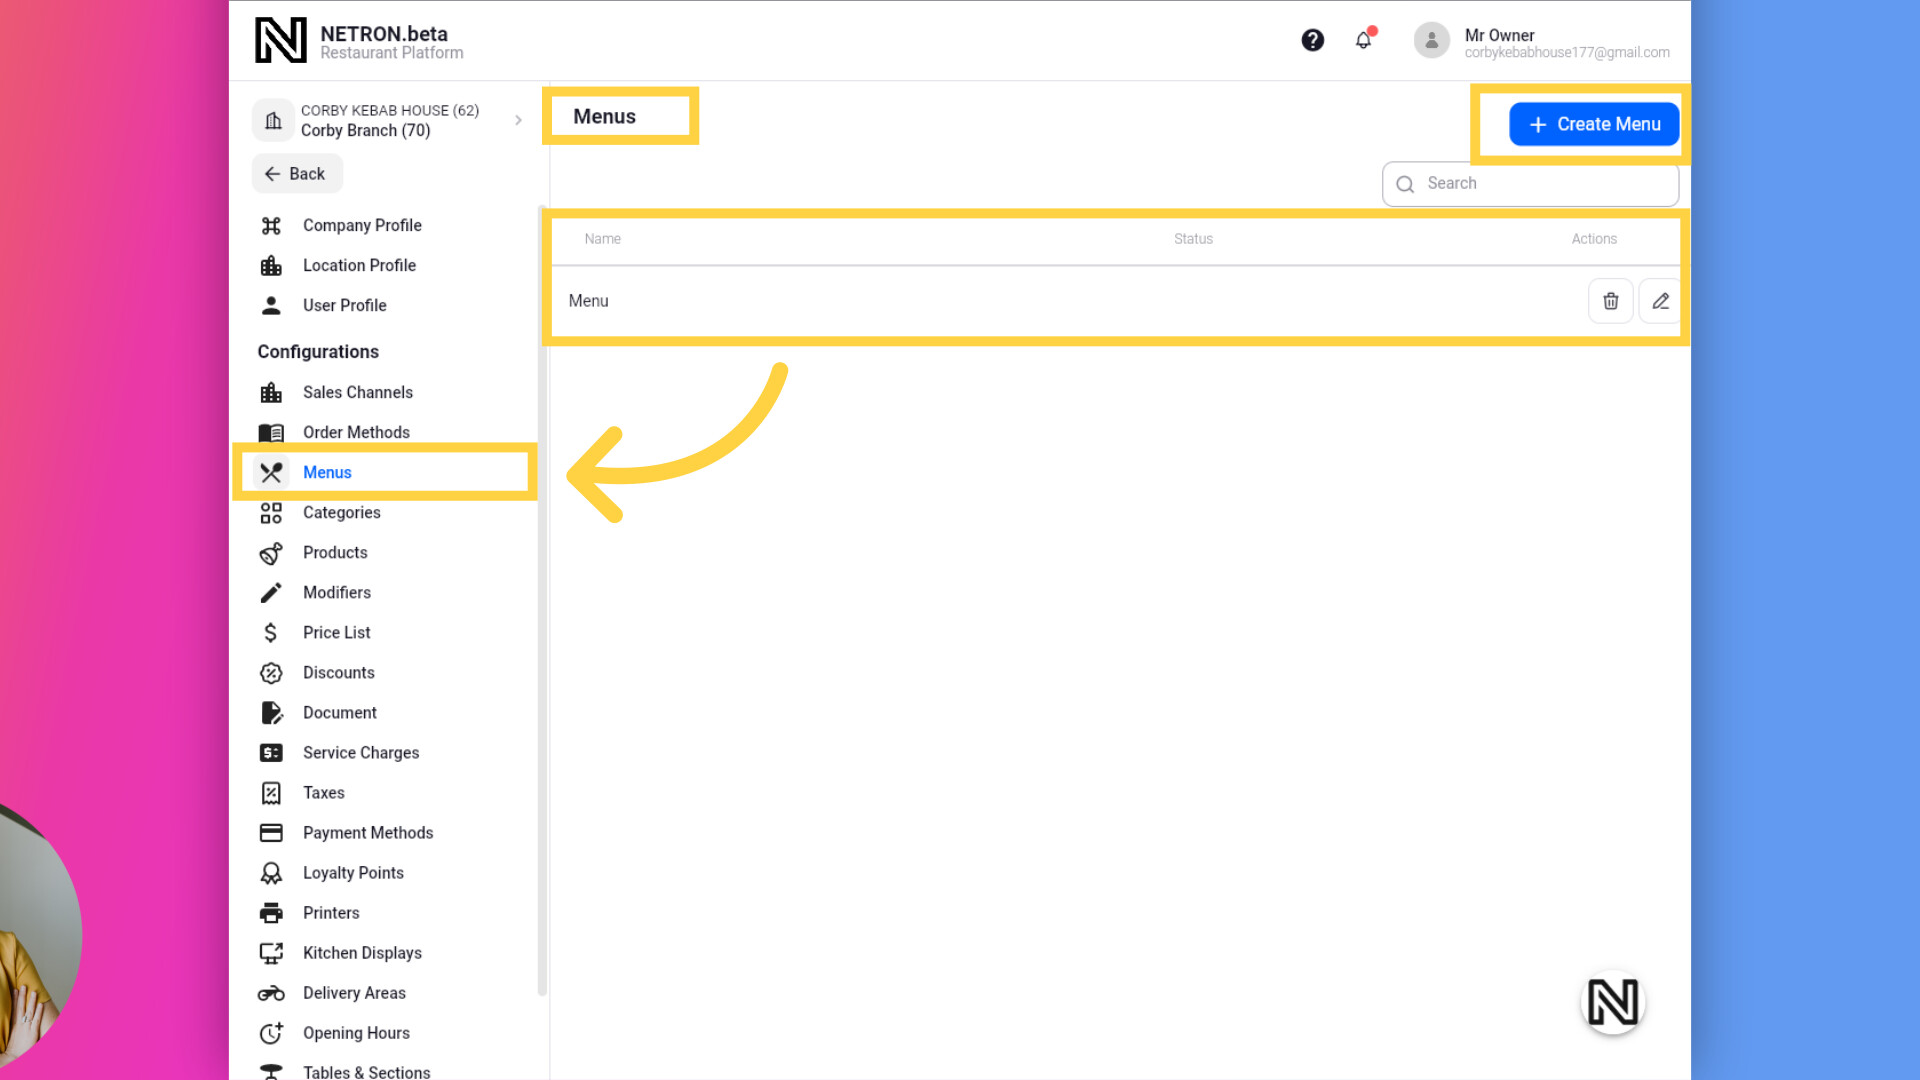
On the Menus page, you can see a list of all menus with buttons to edit or delete them. There is also a “Create Menu” button on the page.
4. Create Menu Button
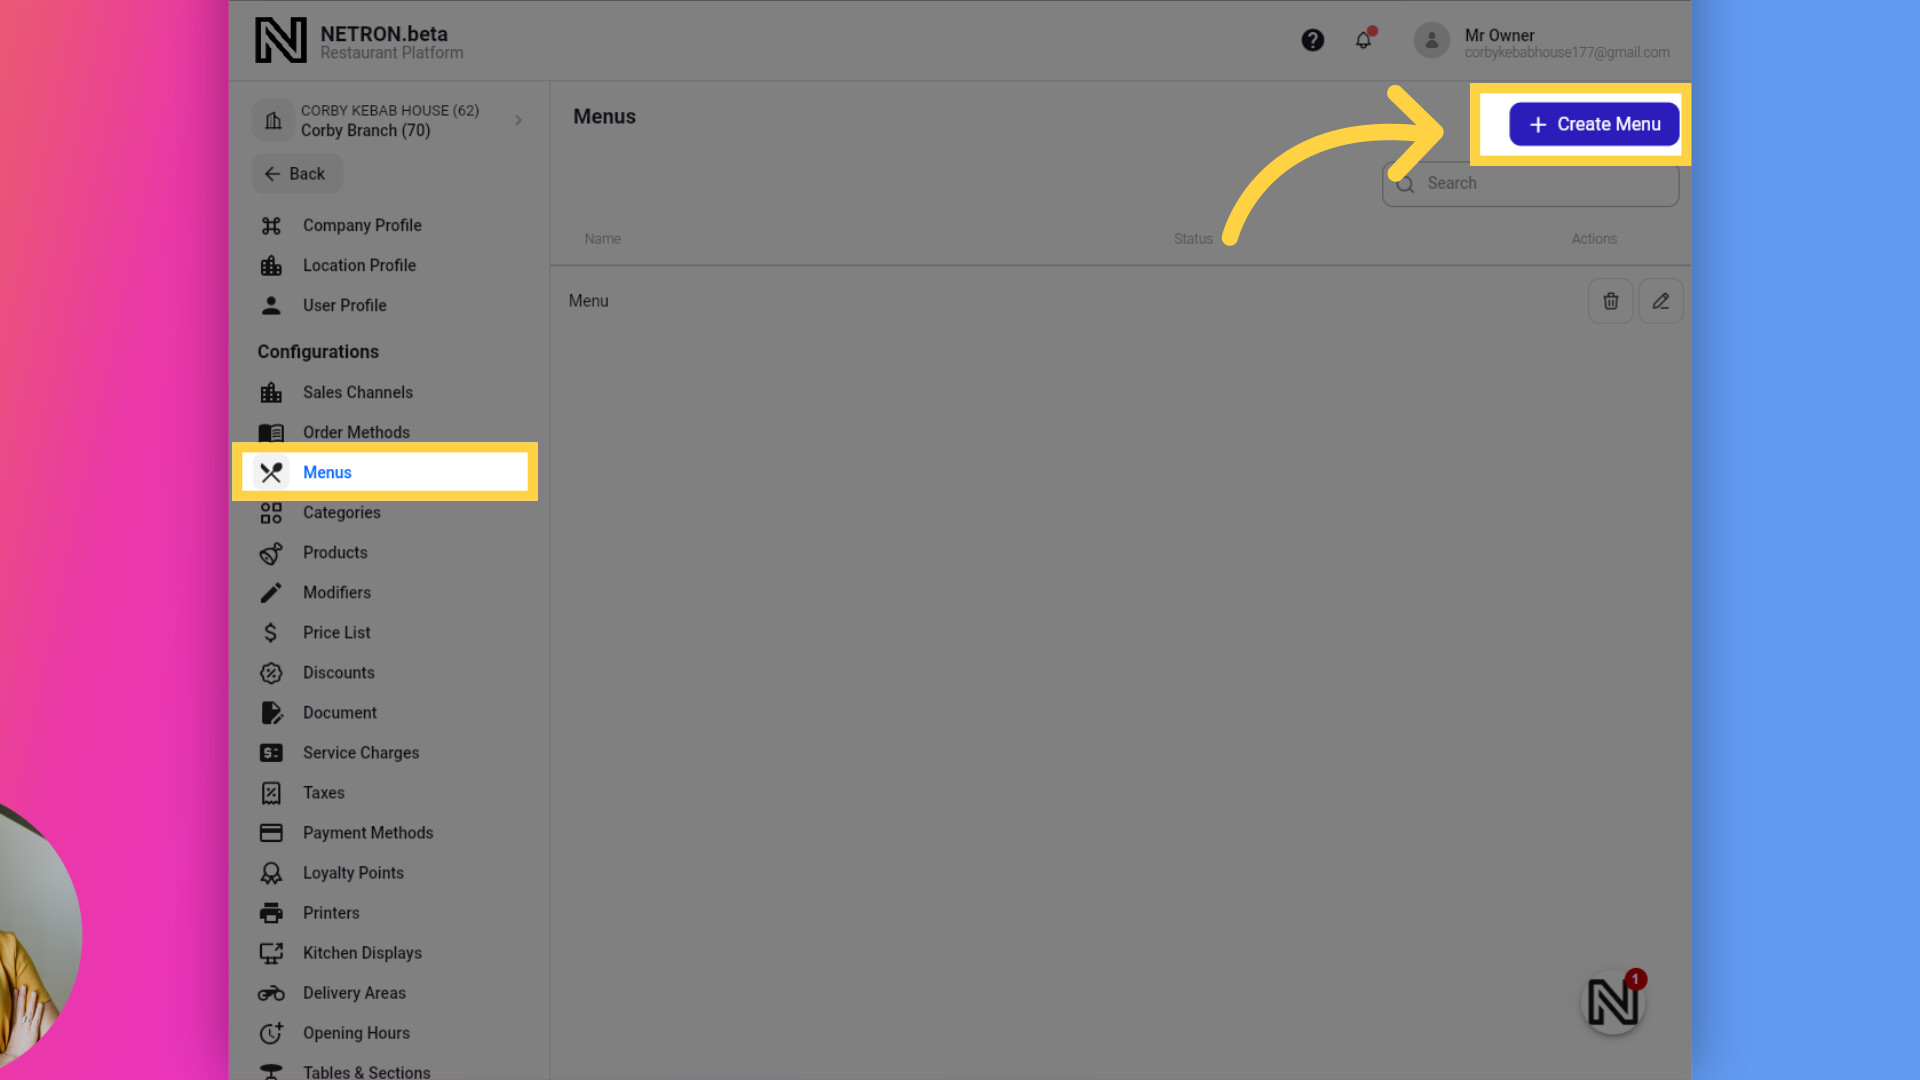
To create a new Menu, click the Create Menu button. This will open a new Menu page.
5. Create Menu Page
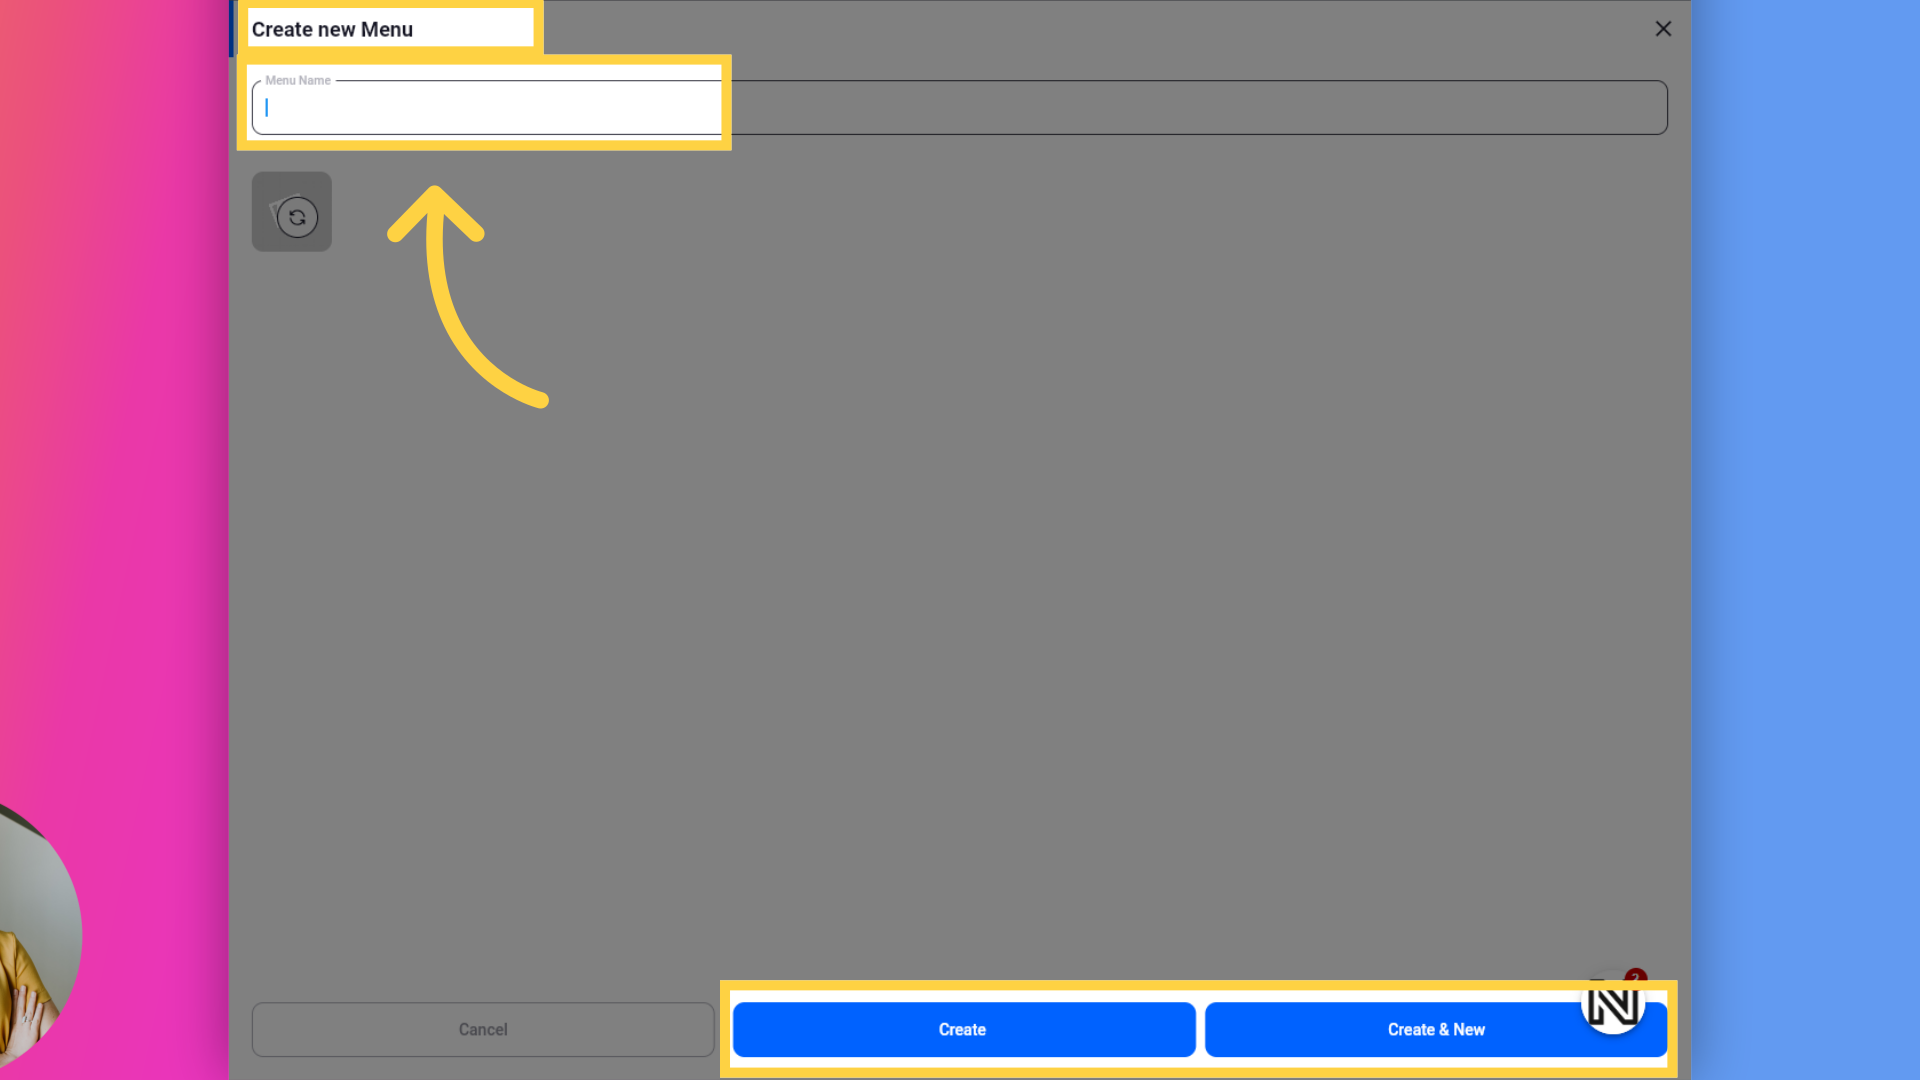
After the new Menu page opens, click on Menu Name and type the desired Menu name. Click the [Create New] button if you would like to create another Menu and stay on the same page. If not, click the [Create] button to save and close the window, returning to the Menus list page.
6. Edit Menu
To Edit your Menu, click here Edit Menu button. This will open a Edit Menu page.
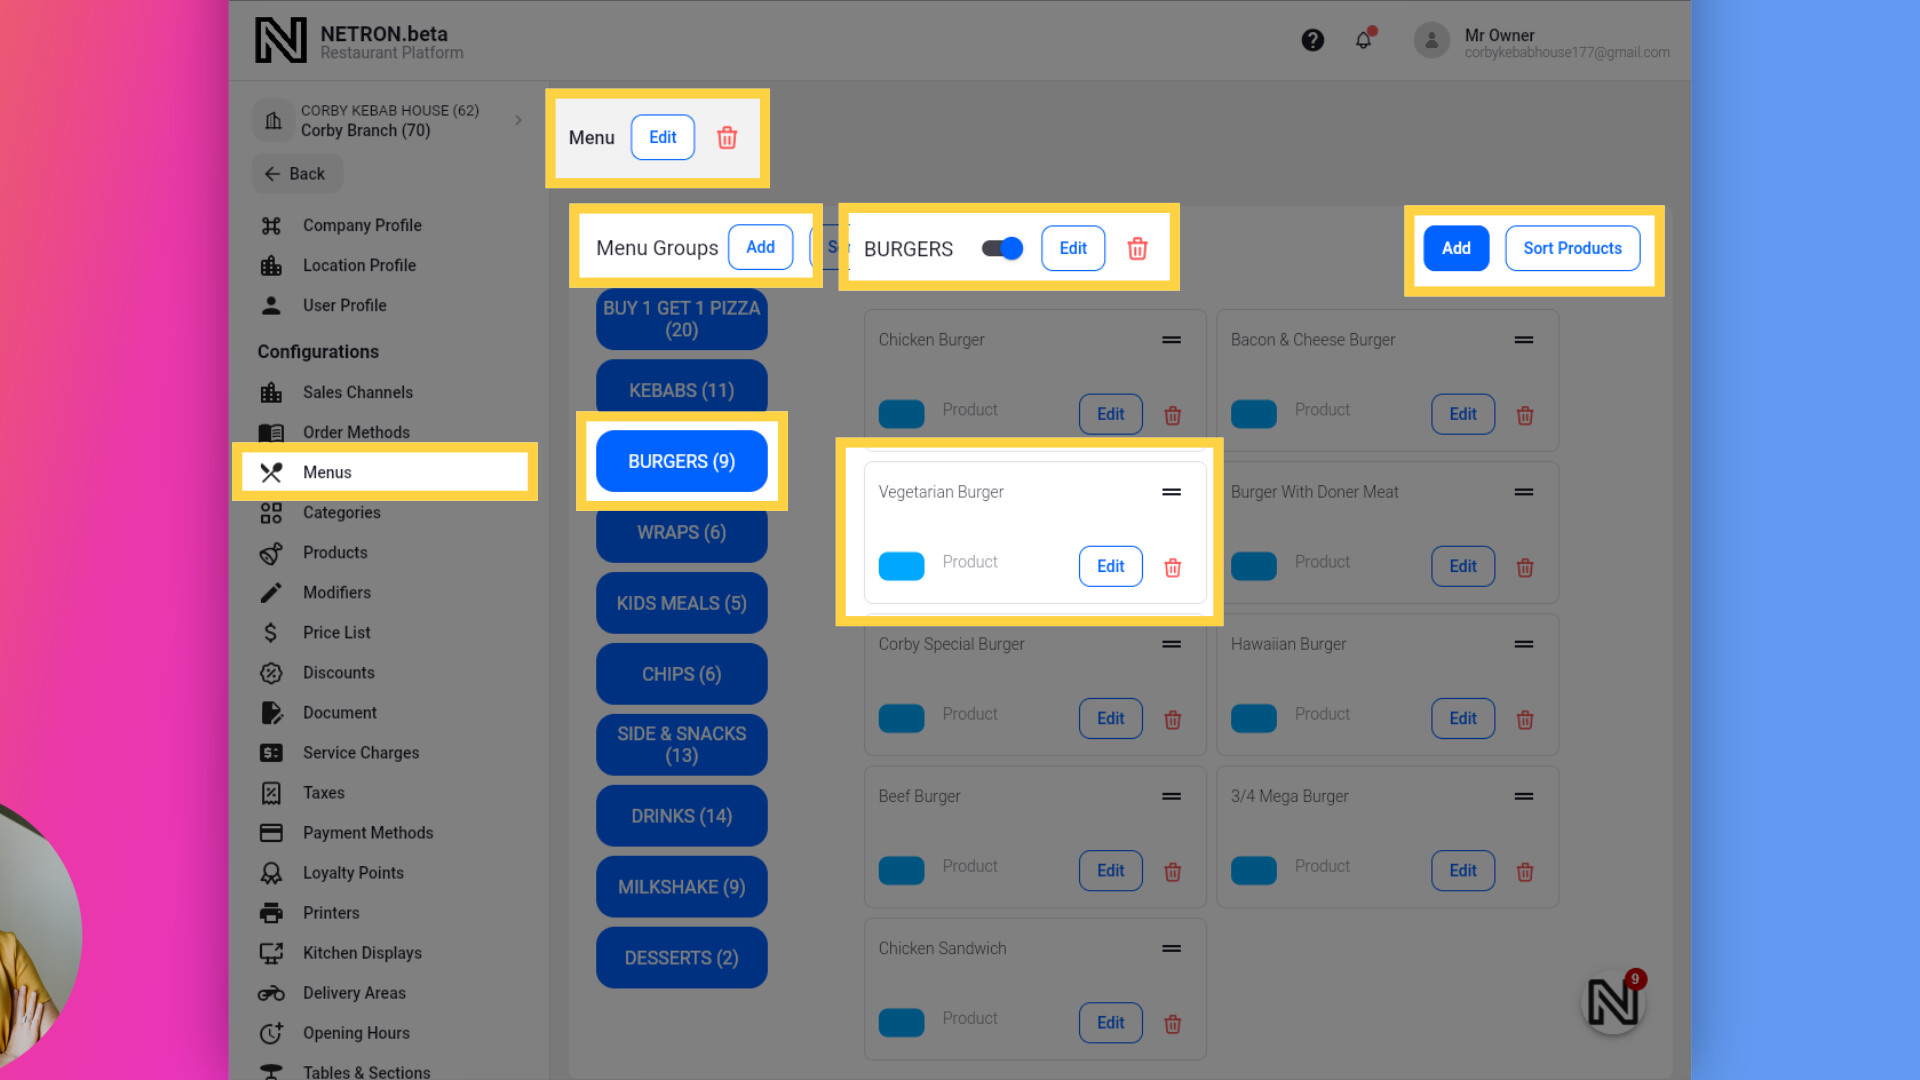
7. Menu Group Page Overview
This is the Edit Menu page where you can create Menu Groups, add or remove products within those groups, and sort them as needed. 1. Menu Name 2. Menu Groups List and Add Menu Group button 3. Selected Menu Group 4. Selected Menu Group name, Active button, Edit and Delete buttons 5. The Product in the Selected Menu Group and Edit and Delete buttons 6. Add Products to Selected Menu Group and Sort Products in the Selected Menu Group
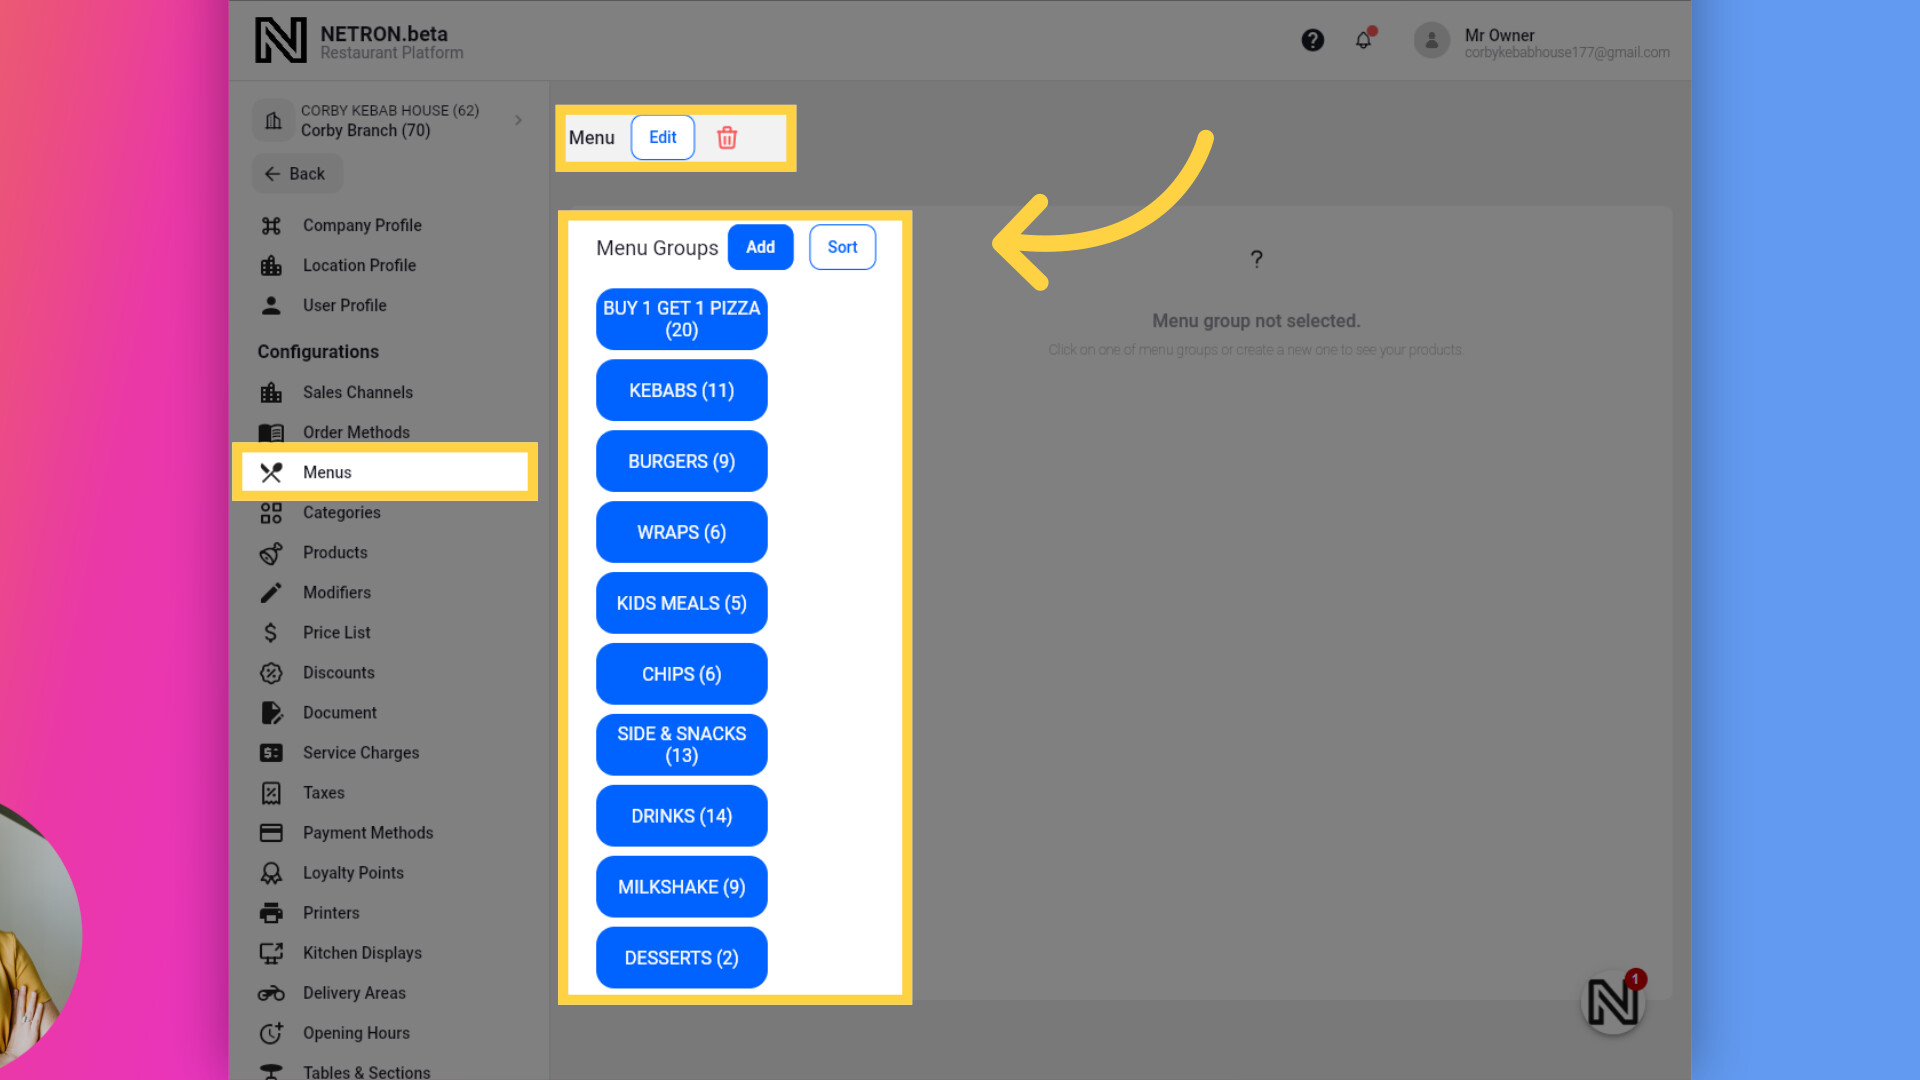
8. Menu Groups Add/Sort and List
In this section, you can see a list of already created menu groups within the menu. You can add, delete, or sort the menu groups.
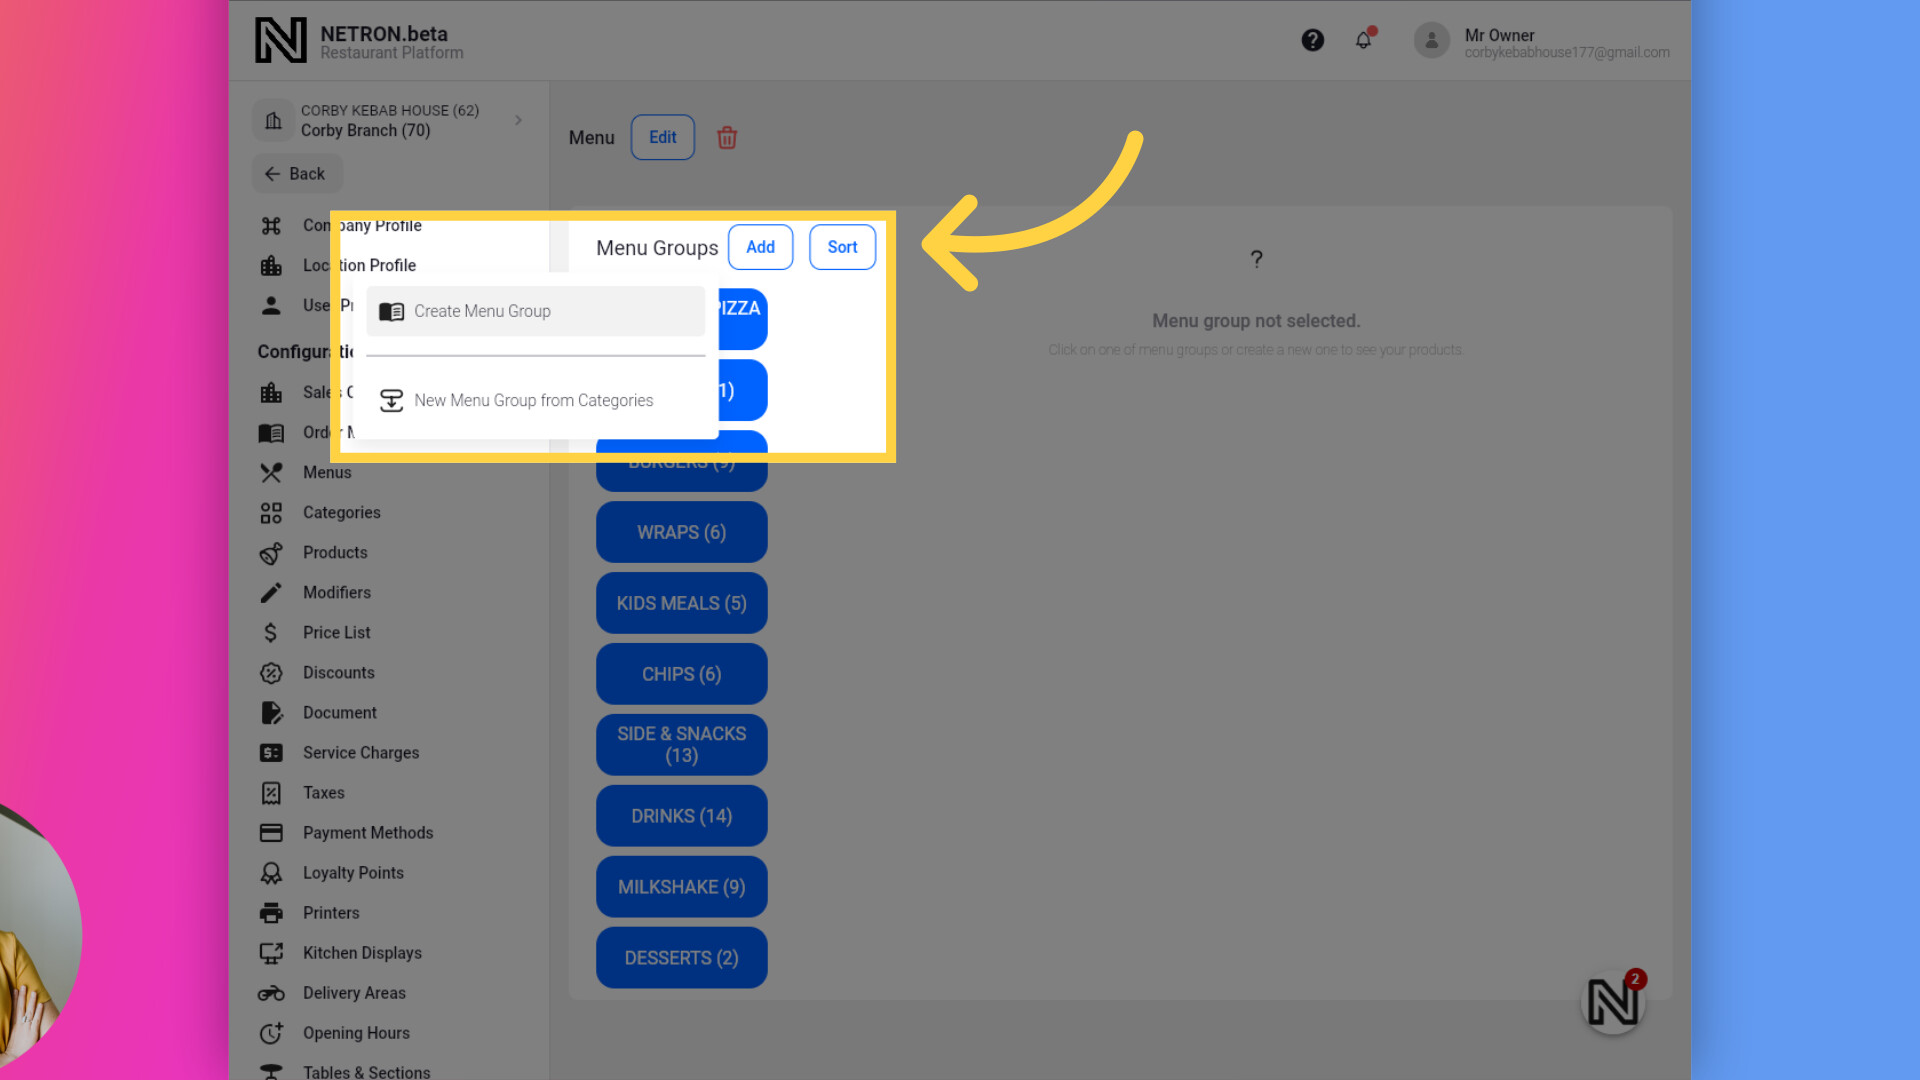
9. Add Menu Group
Click the “Add” button to access two options: Create a new single menu group or Create menu groups from category names.
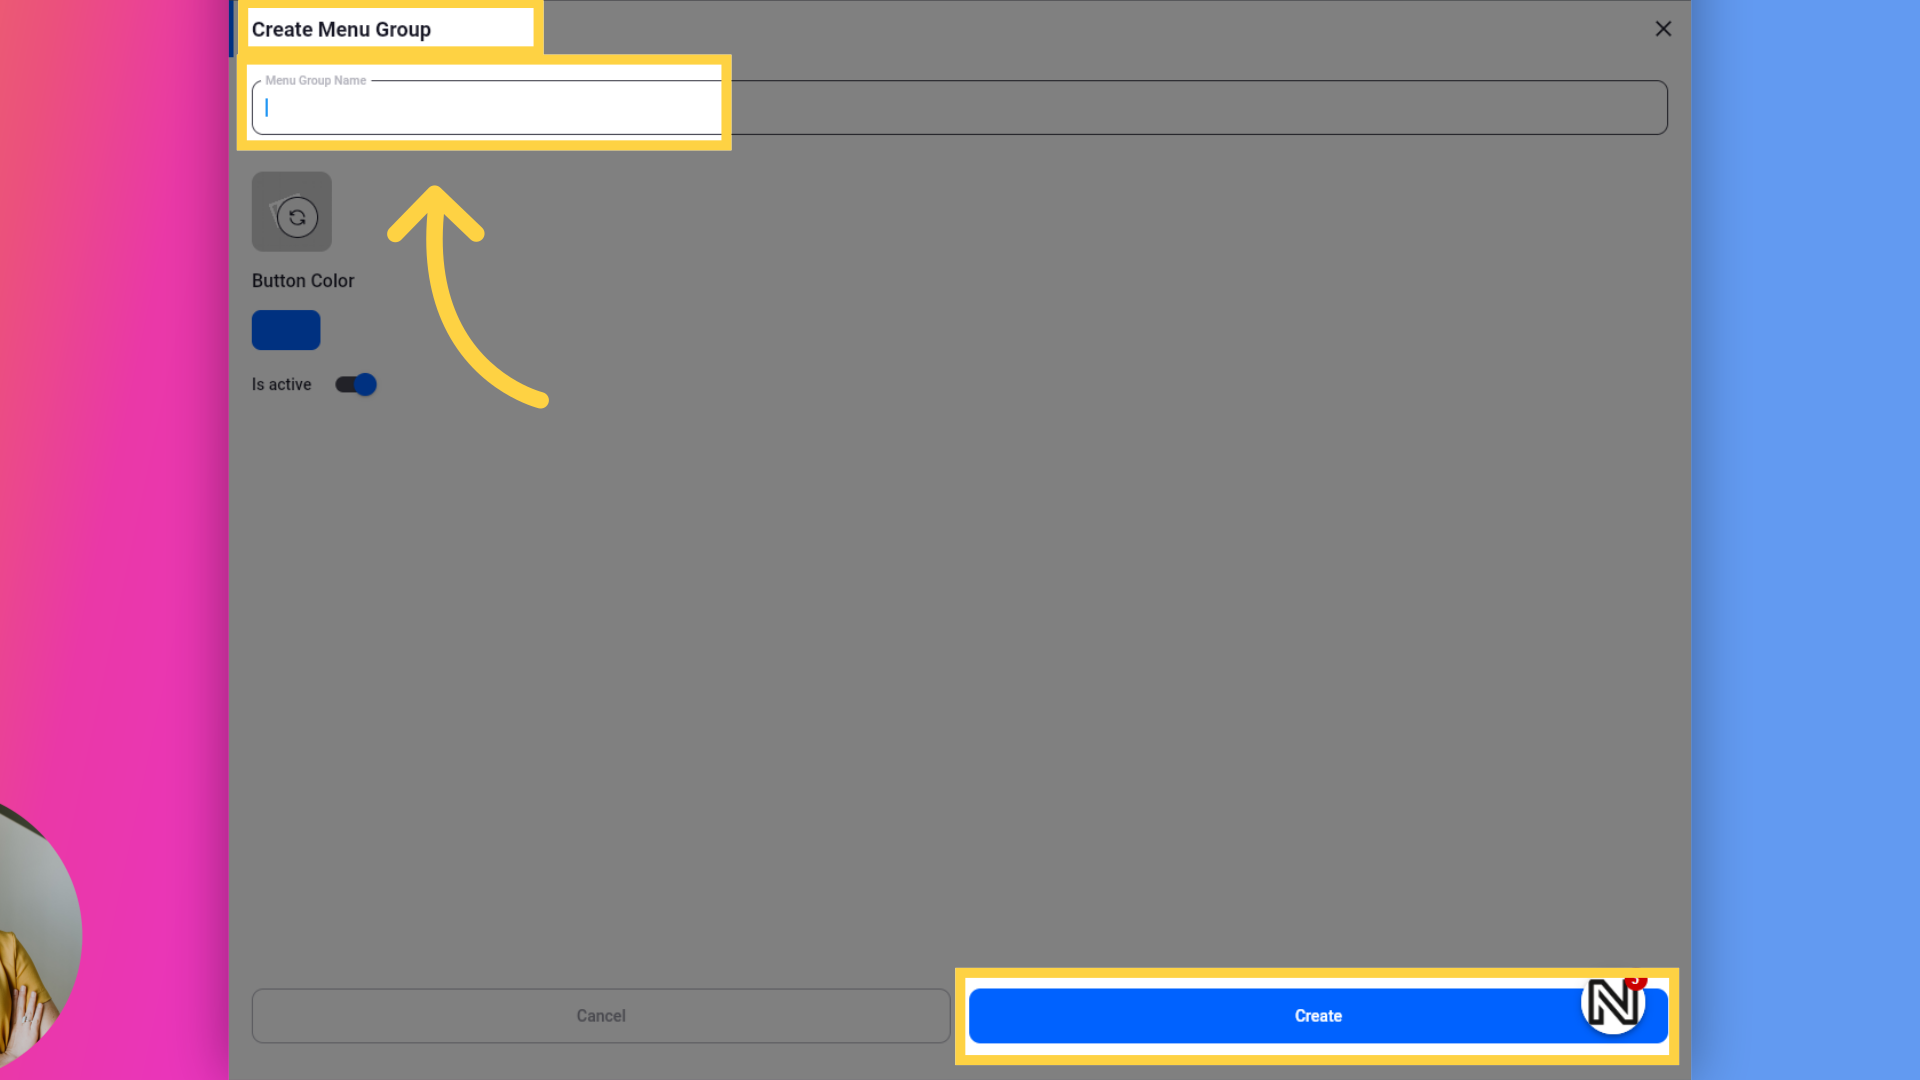
10. Create Menu Group
After the new Menu Group page opens, click on Menu Group Name and type the desired Menu Group name. Click the [Create] button to save and close the window, returning to the Menu Group list page.
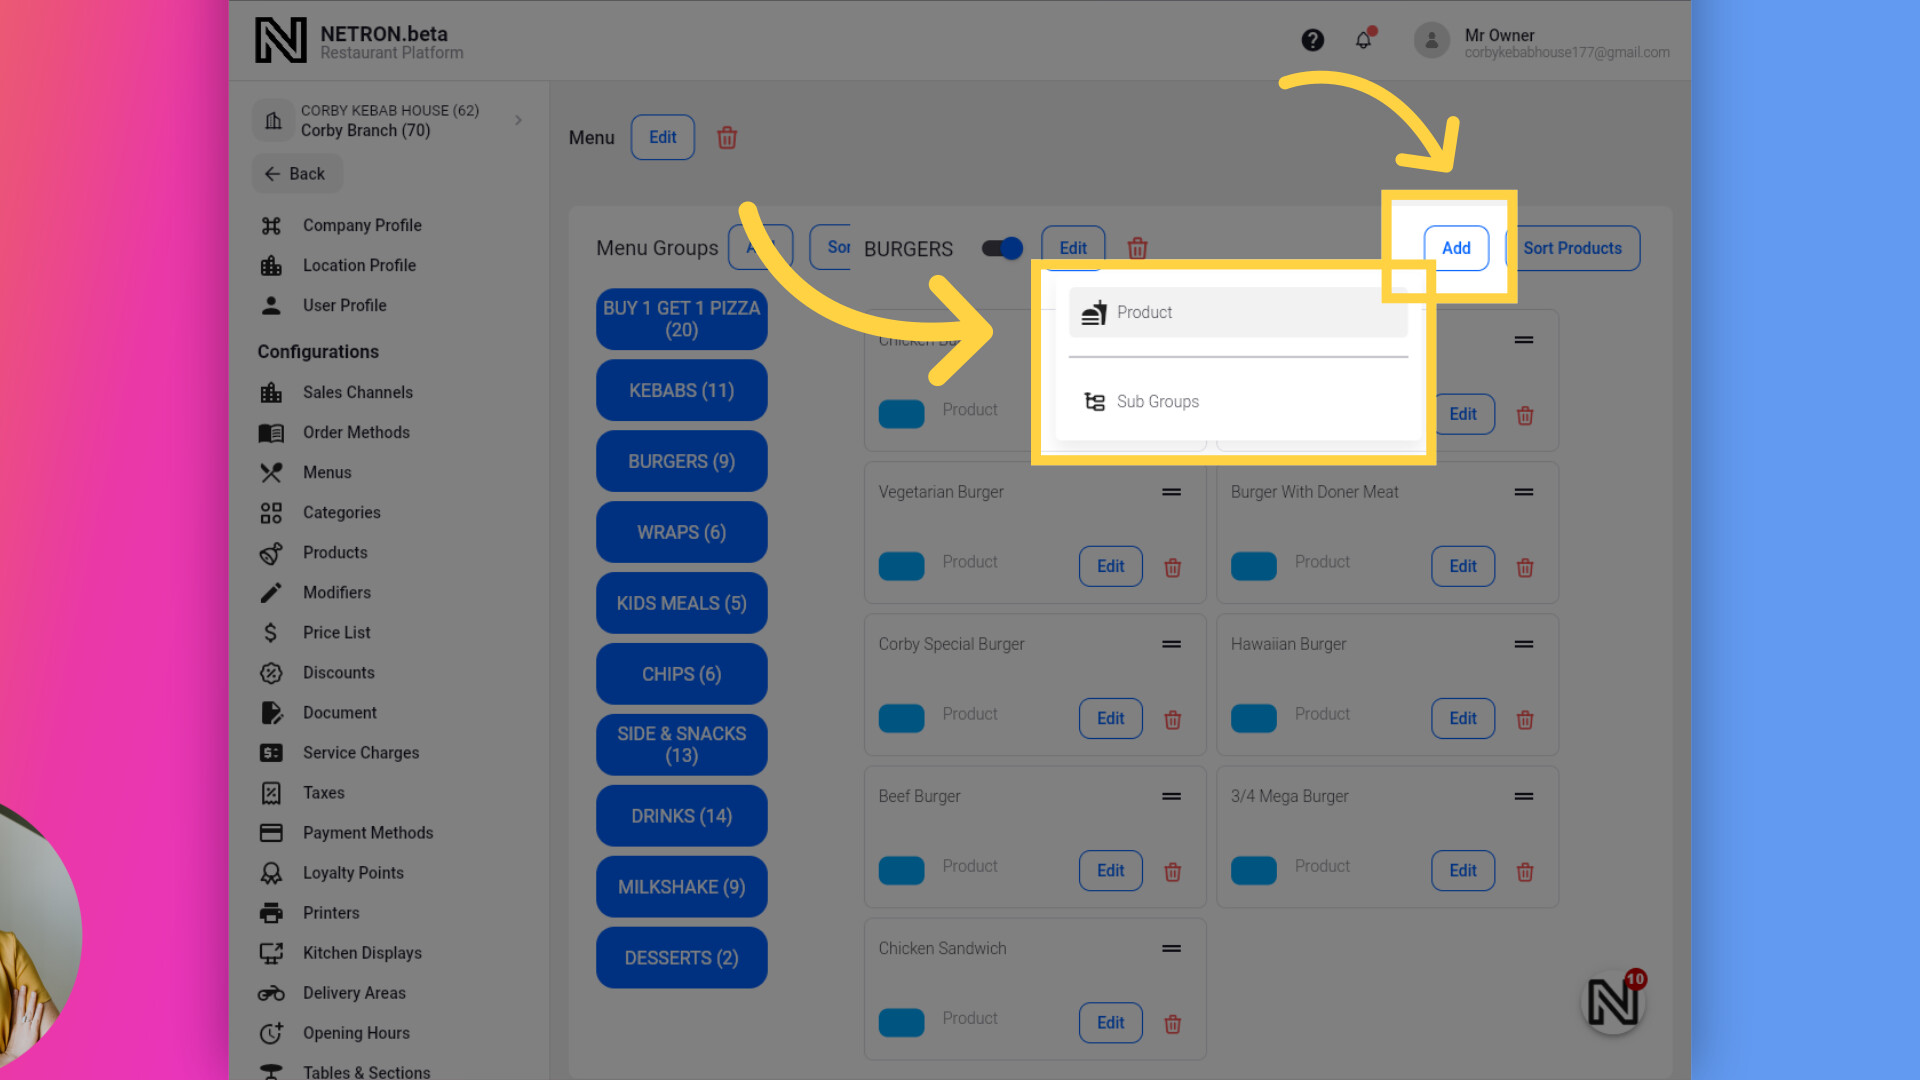
11. Add Products Button
Click the “Add” button under the selected Menu Group to access two options: Add Products to the Menu Groups or Create new Sub-Menu groups under the selected Menu Group.
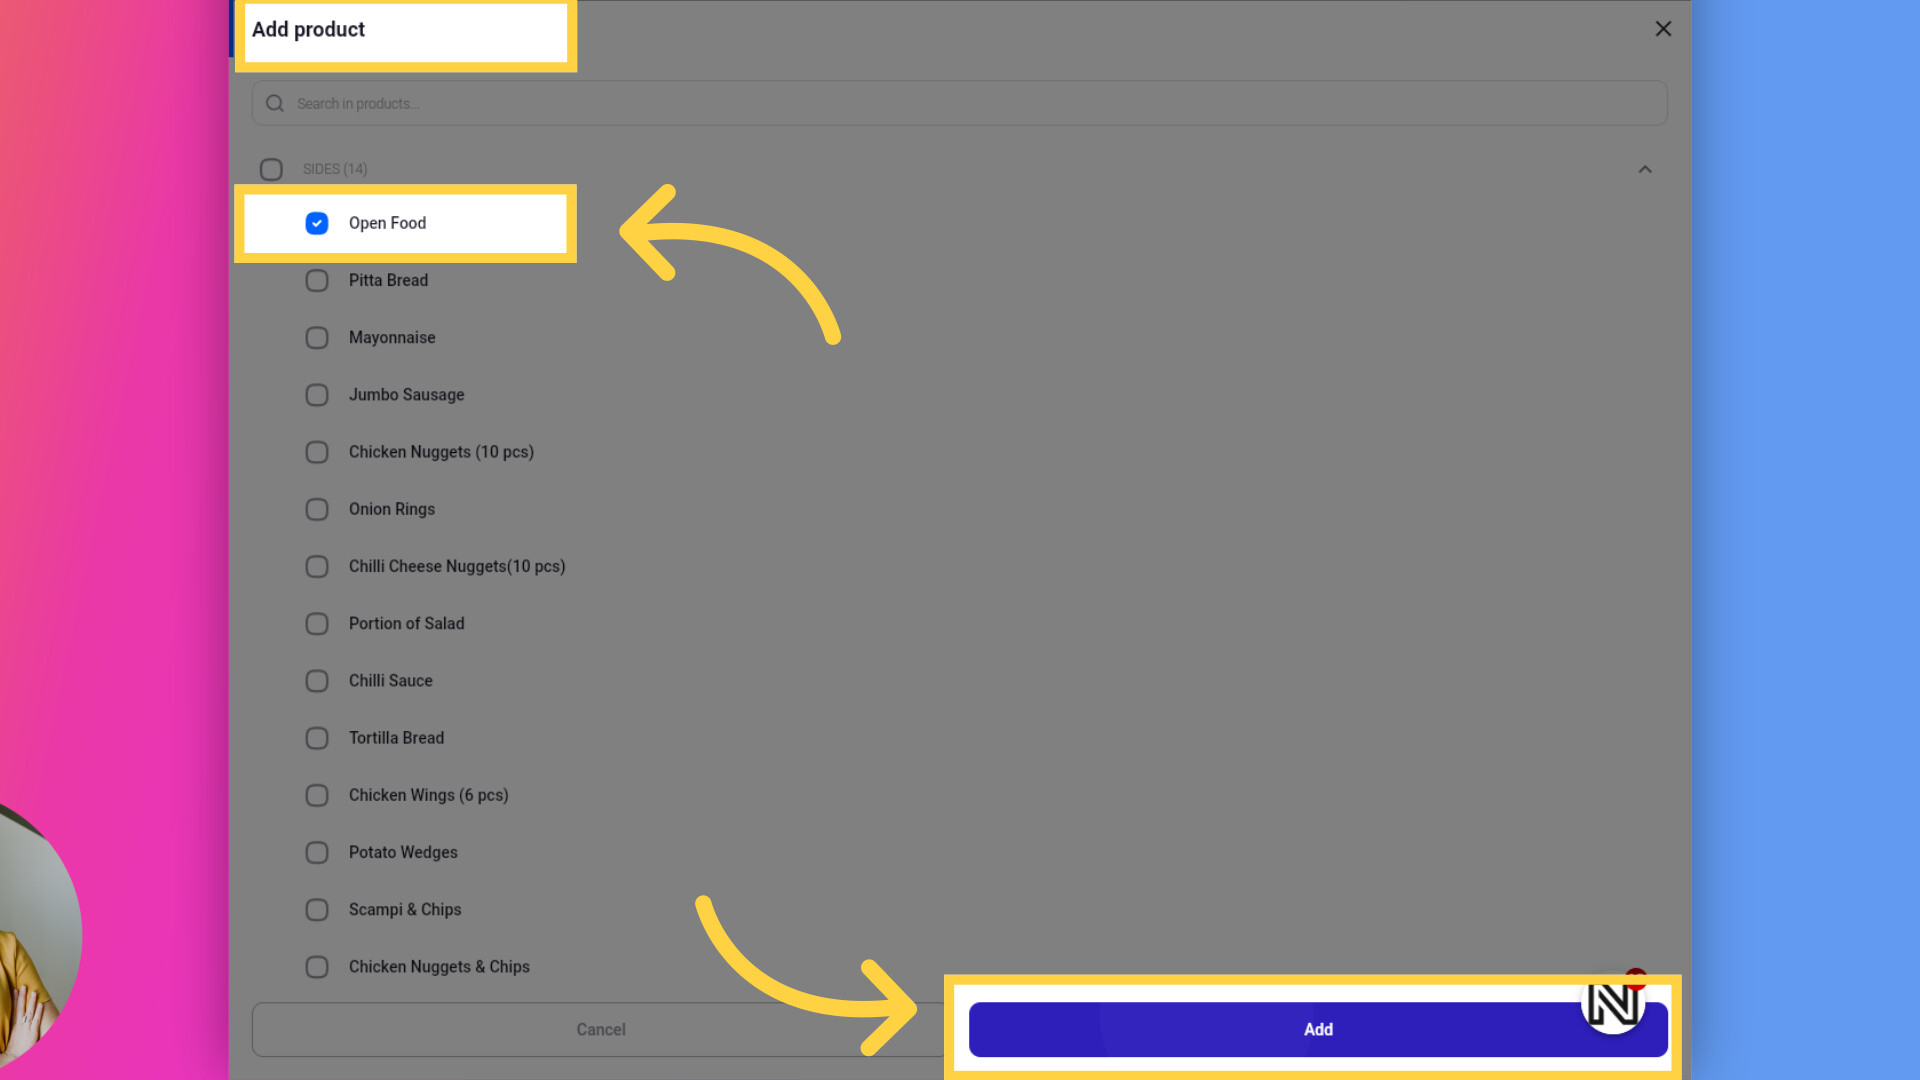
12. Add Products to Menu Group Page
After opening the “Add Products to Menu Group” page, you can search for or select products to add to the menu group. You can also click on category names to select all products under those categories for addition to the menu group. Finally, click the “Add” button to close the window and return to the list of products in the selected menu group page.
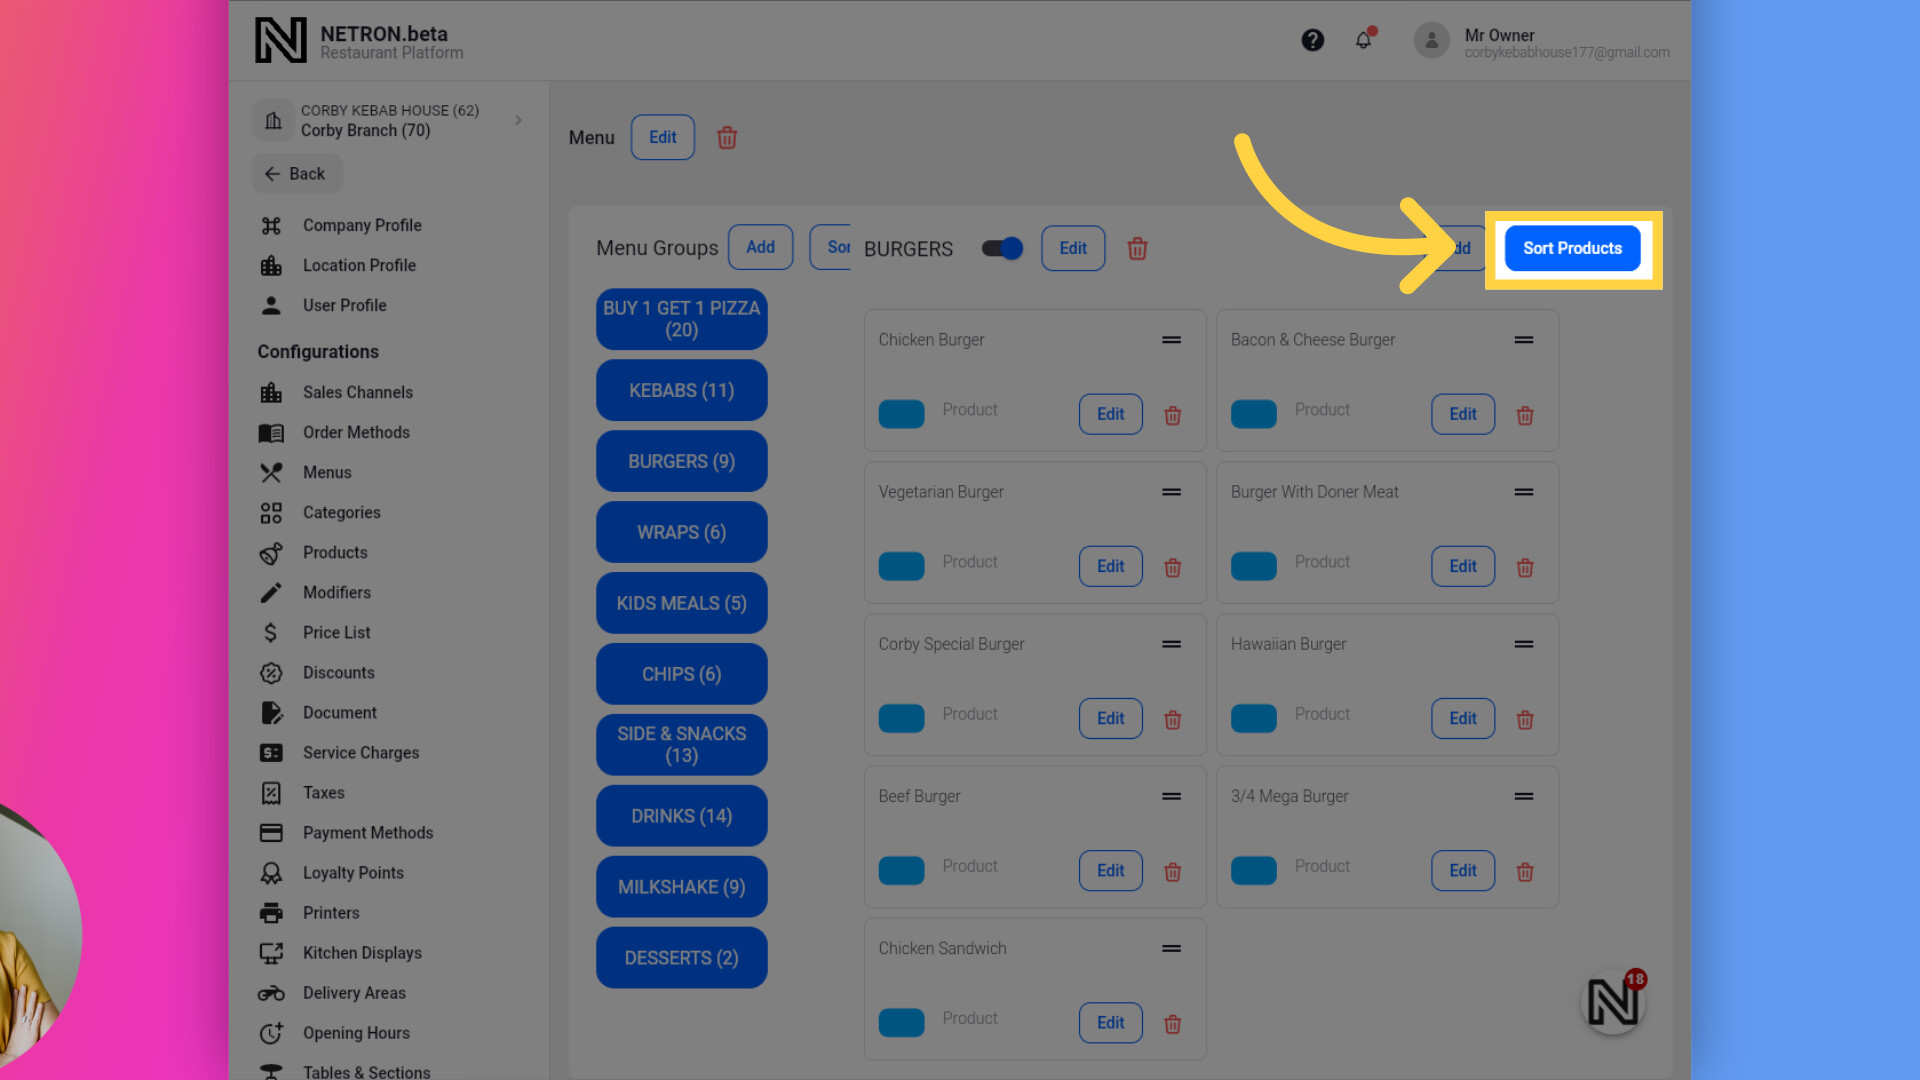
13. Sort Products in Menu Group
You can also sort or arrange Products within the Menu Groups as you would like. To sort the Products, click here.
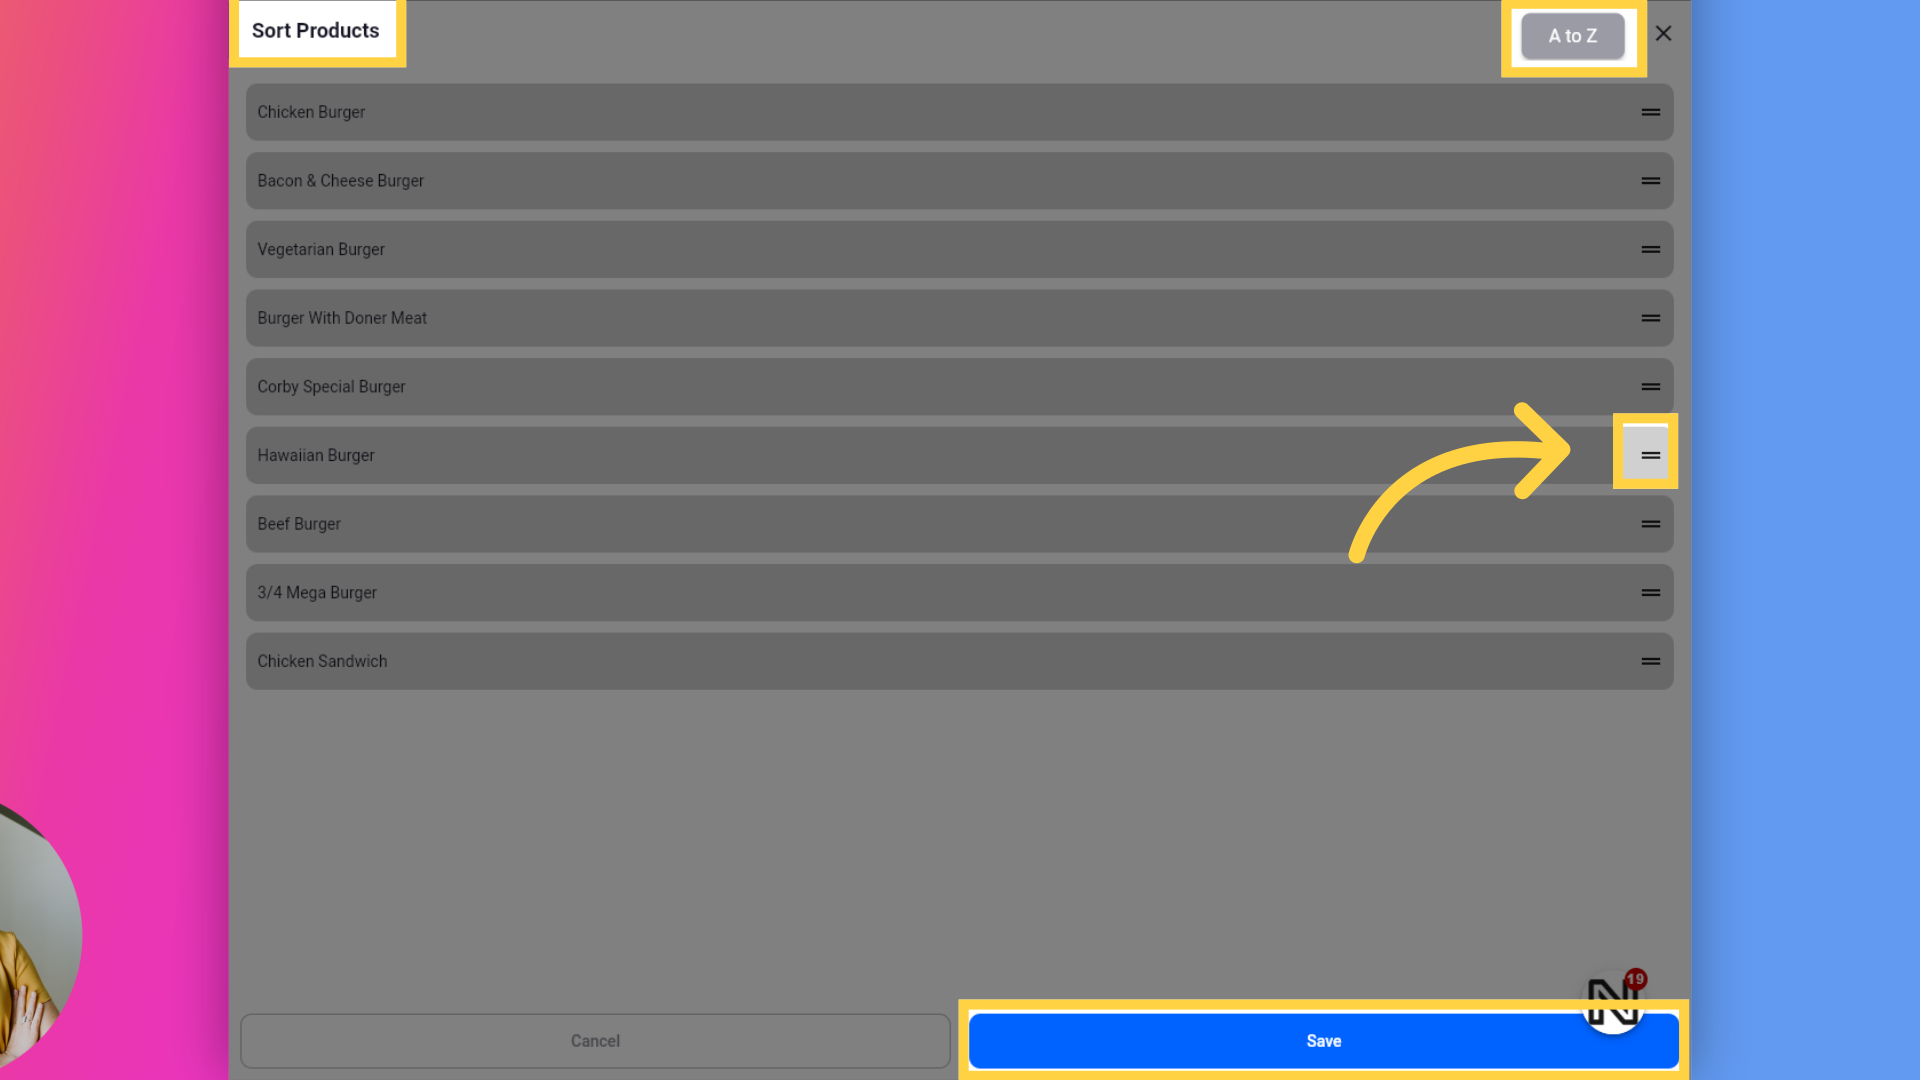
14. Sorting Products Page
To sort your Products, tap-hold on the 3-lines icon and drag and drop the Products to your desired position. You can also click “A to Z” button to arrange products by alphabetical order. Then click the Save button.
You’ve successfully mastered creating Menu and Menu Groups on the Netron Takeaway & Delivery Restaurants Platform. Don’t hesitate to reach out to our supportive Takeaway Owners community on https://community.netroneats.com