
Welcome to Netron. Takeaway & Delivery Restaurants Platform.
Go to app.netroneats.com
1. Printers Guide
In this guide we will show you the Printers section in the Netron platform. Let’s get started with Printers and show you how to configure these settings.
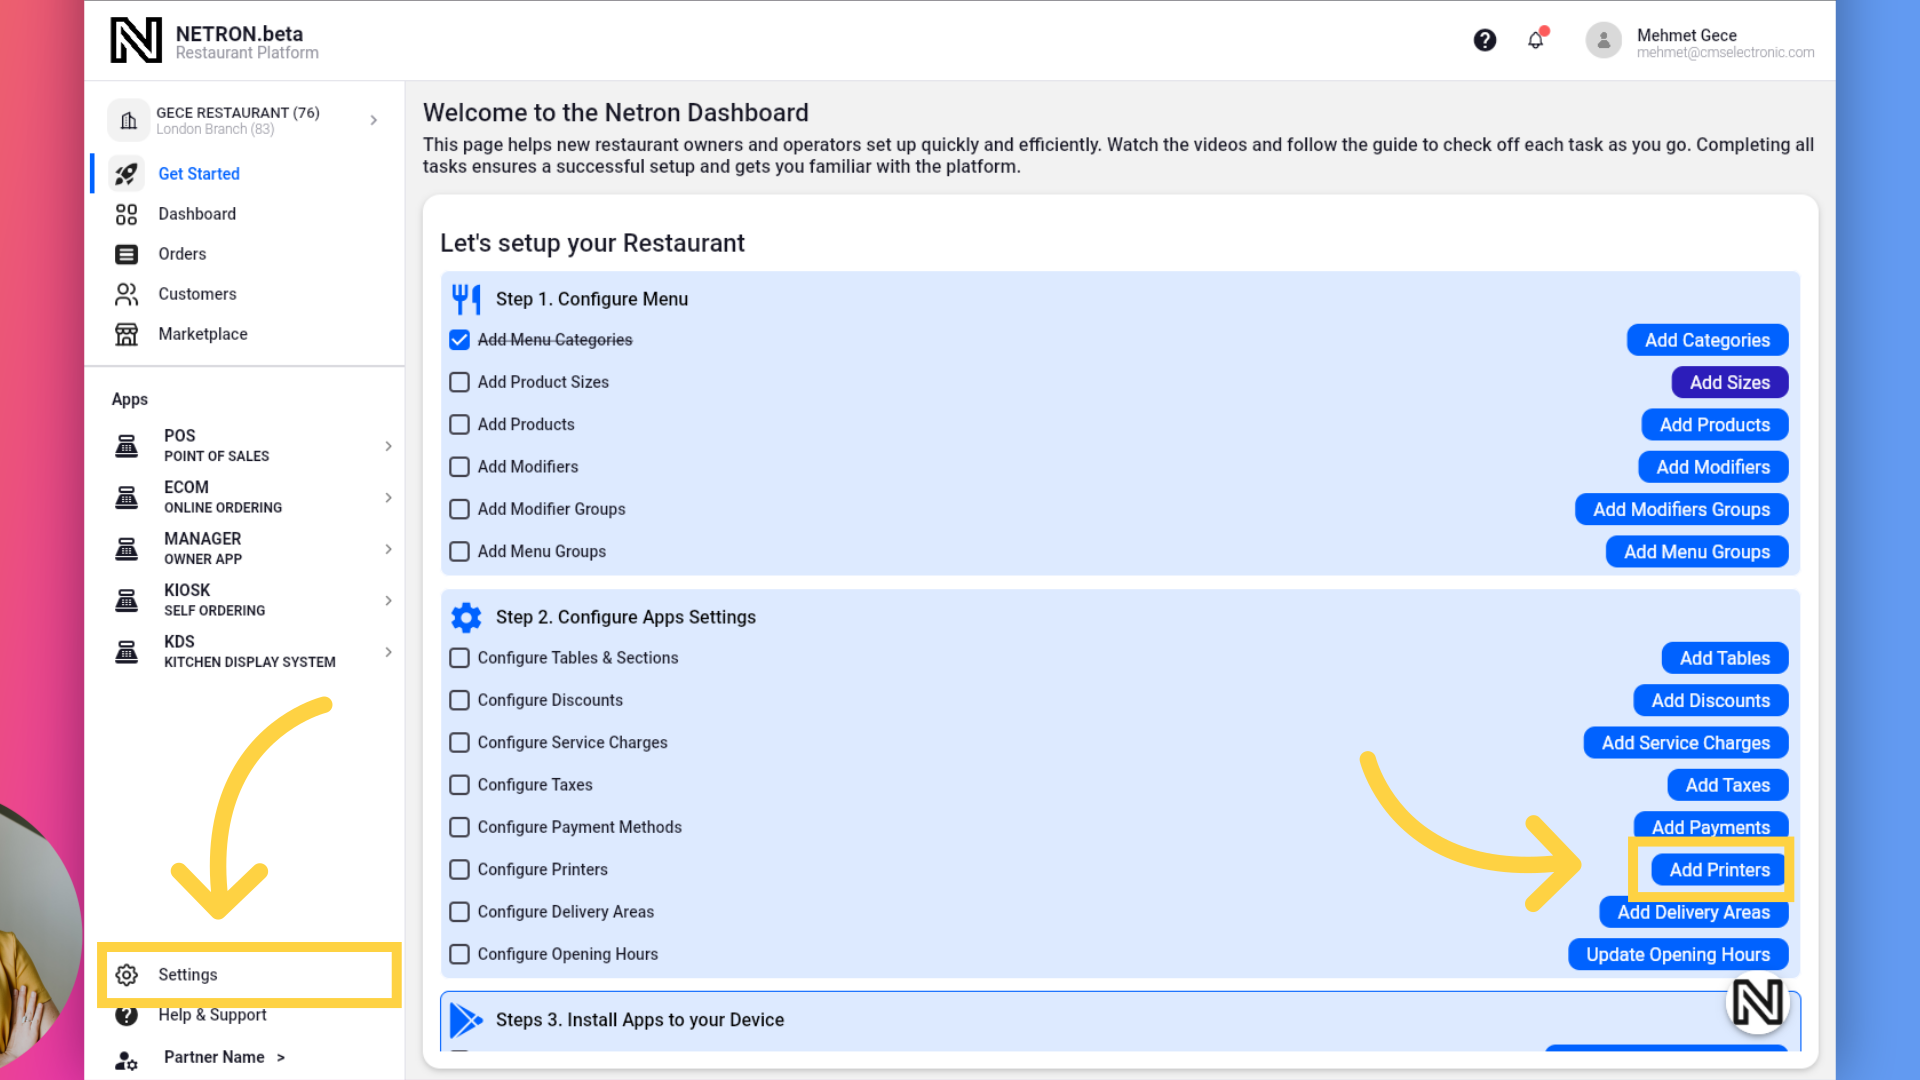
2. Accessing Printer Page
There are two ways to access the Printers page. One is by clicking Settings > Printers. The other is by going to Get Started and clicking the Add Printers button.
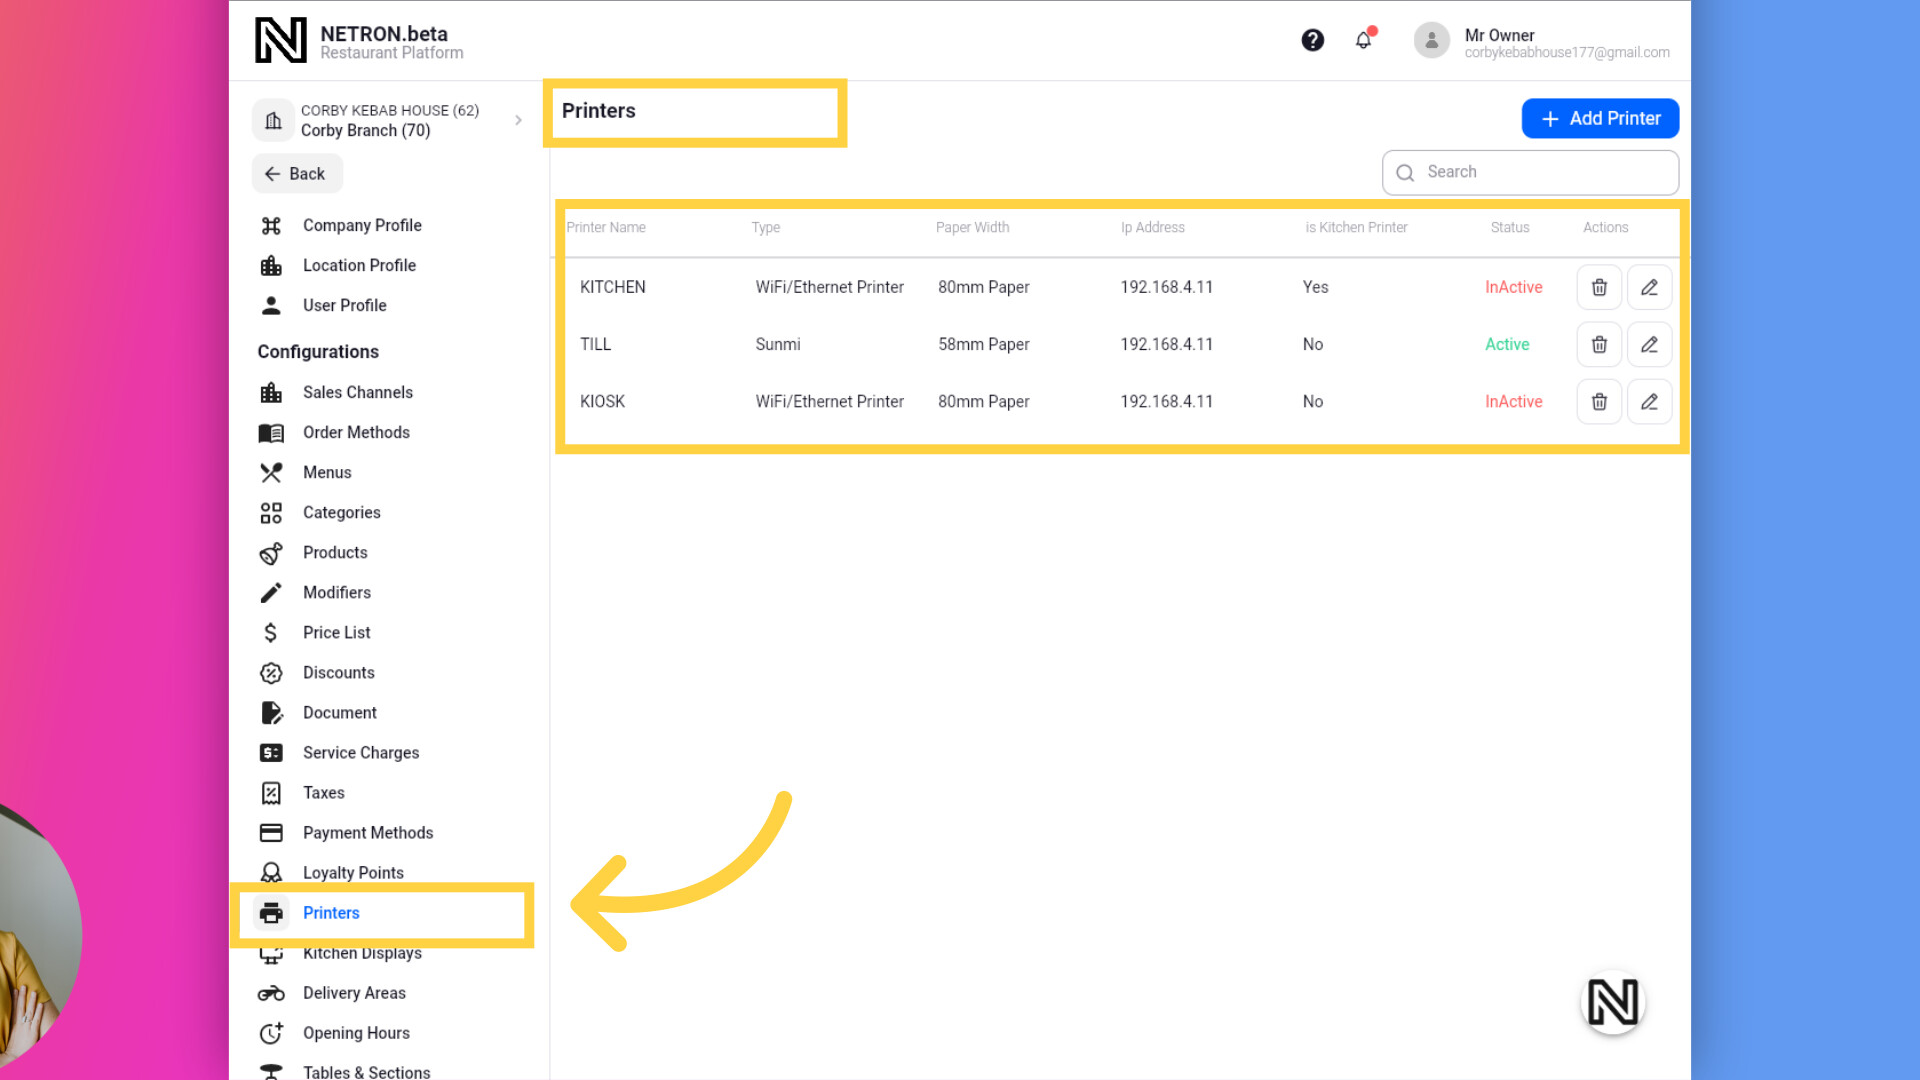
3. Printers List
On the Printers page, you can view your location’s Printers list view. You can create, edit, delete Printers as needed.
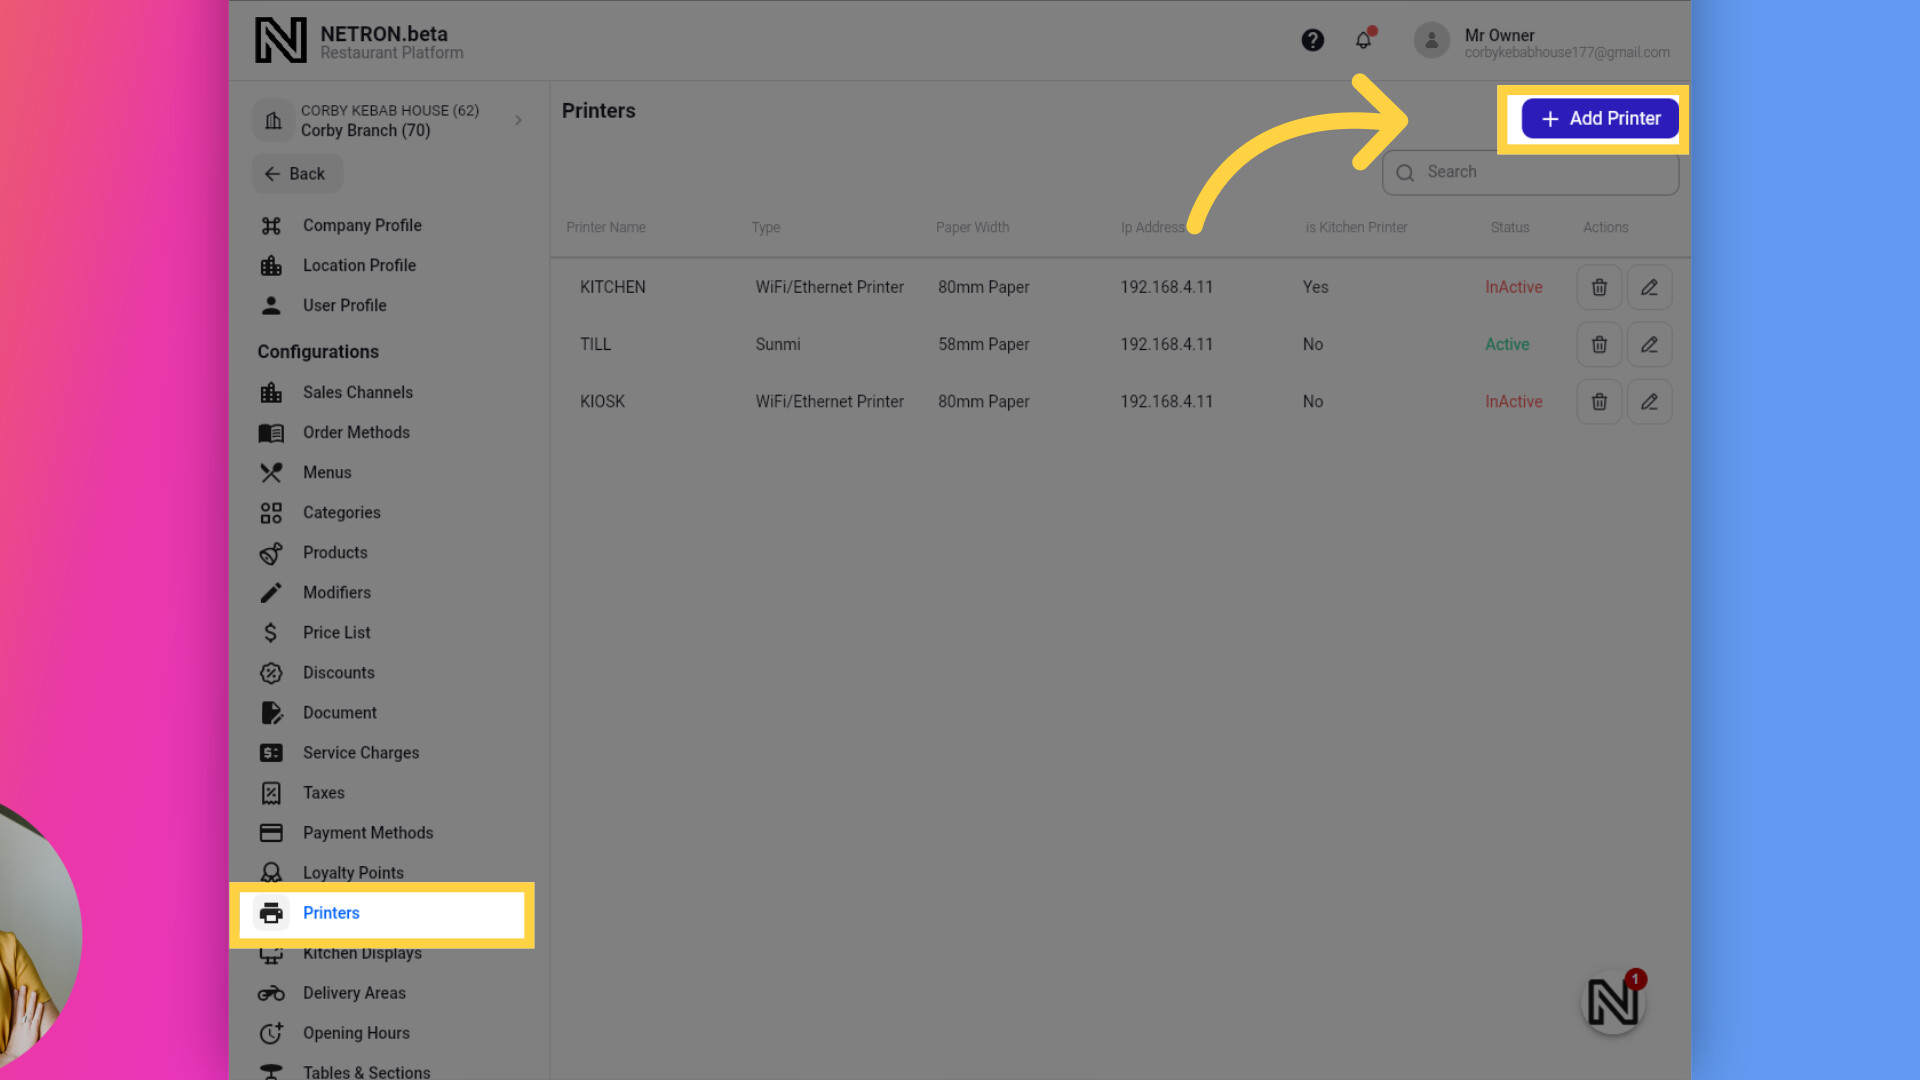
4. Click here to Create Printer
Click here to Create Printer
5. Add Printer Page
After the Create Printer page opens, you will see two tabs. The Details tab is for naming the printer and configuring other settings. The Printer Mapping tab is where you assign which Sales Channels, Order Methods, Categories, and Products can use the printer for kitchen and bill tickets. Let’s start by clicking on the Printer Name field and typing the desired name.
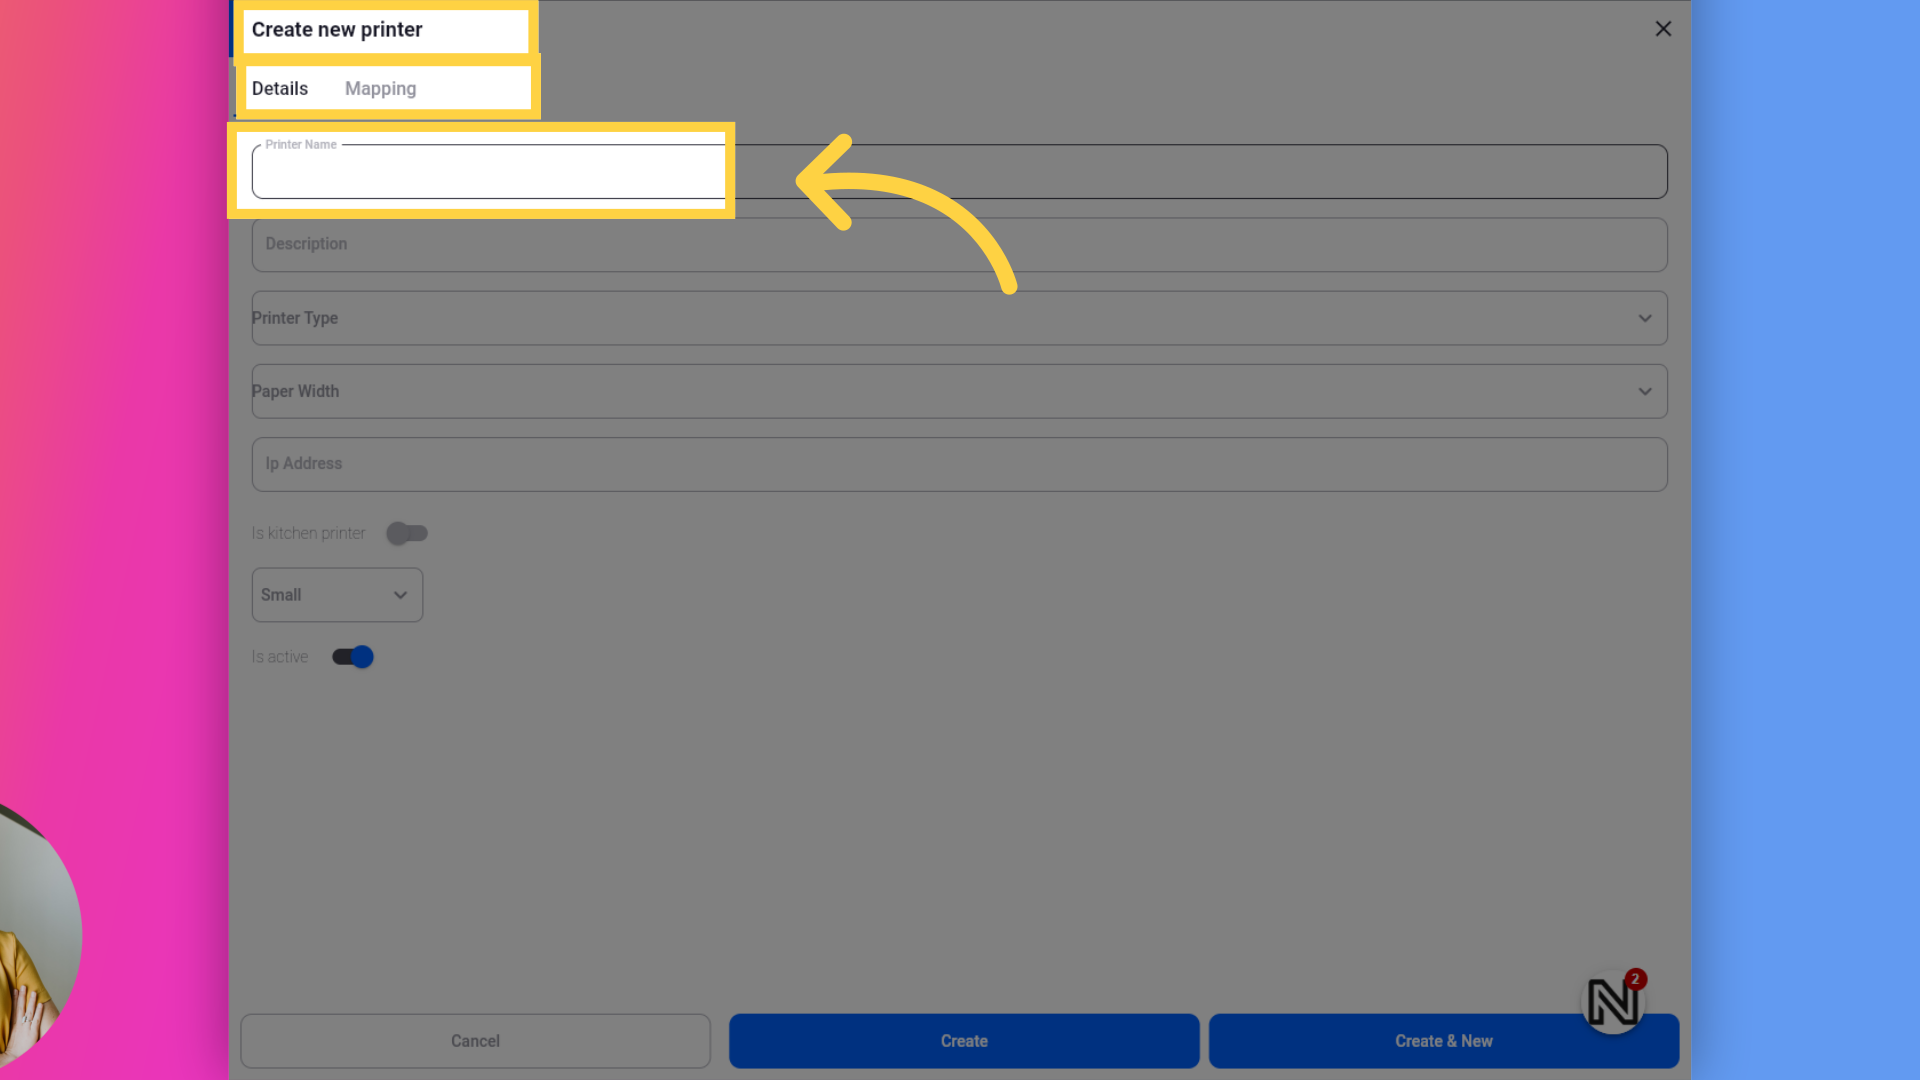
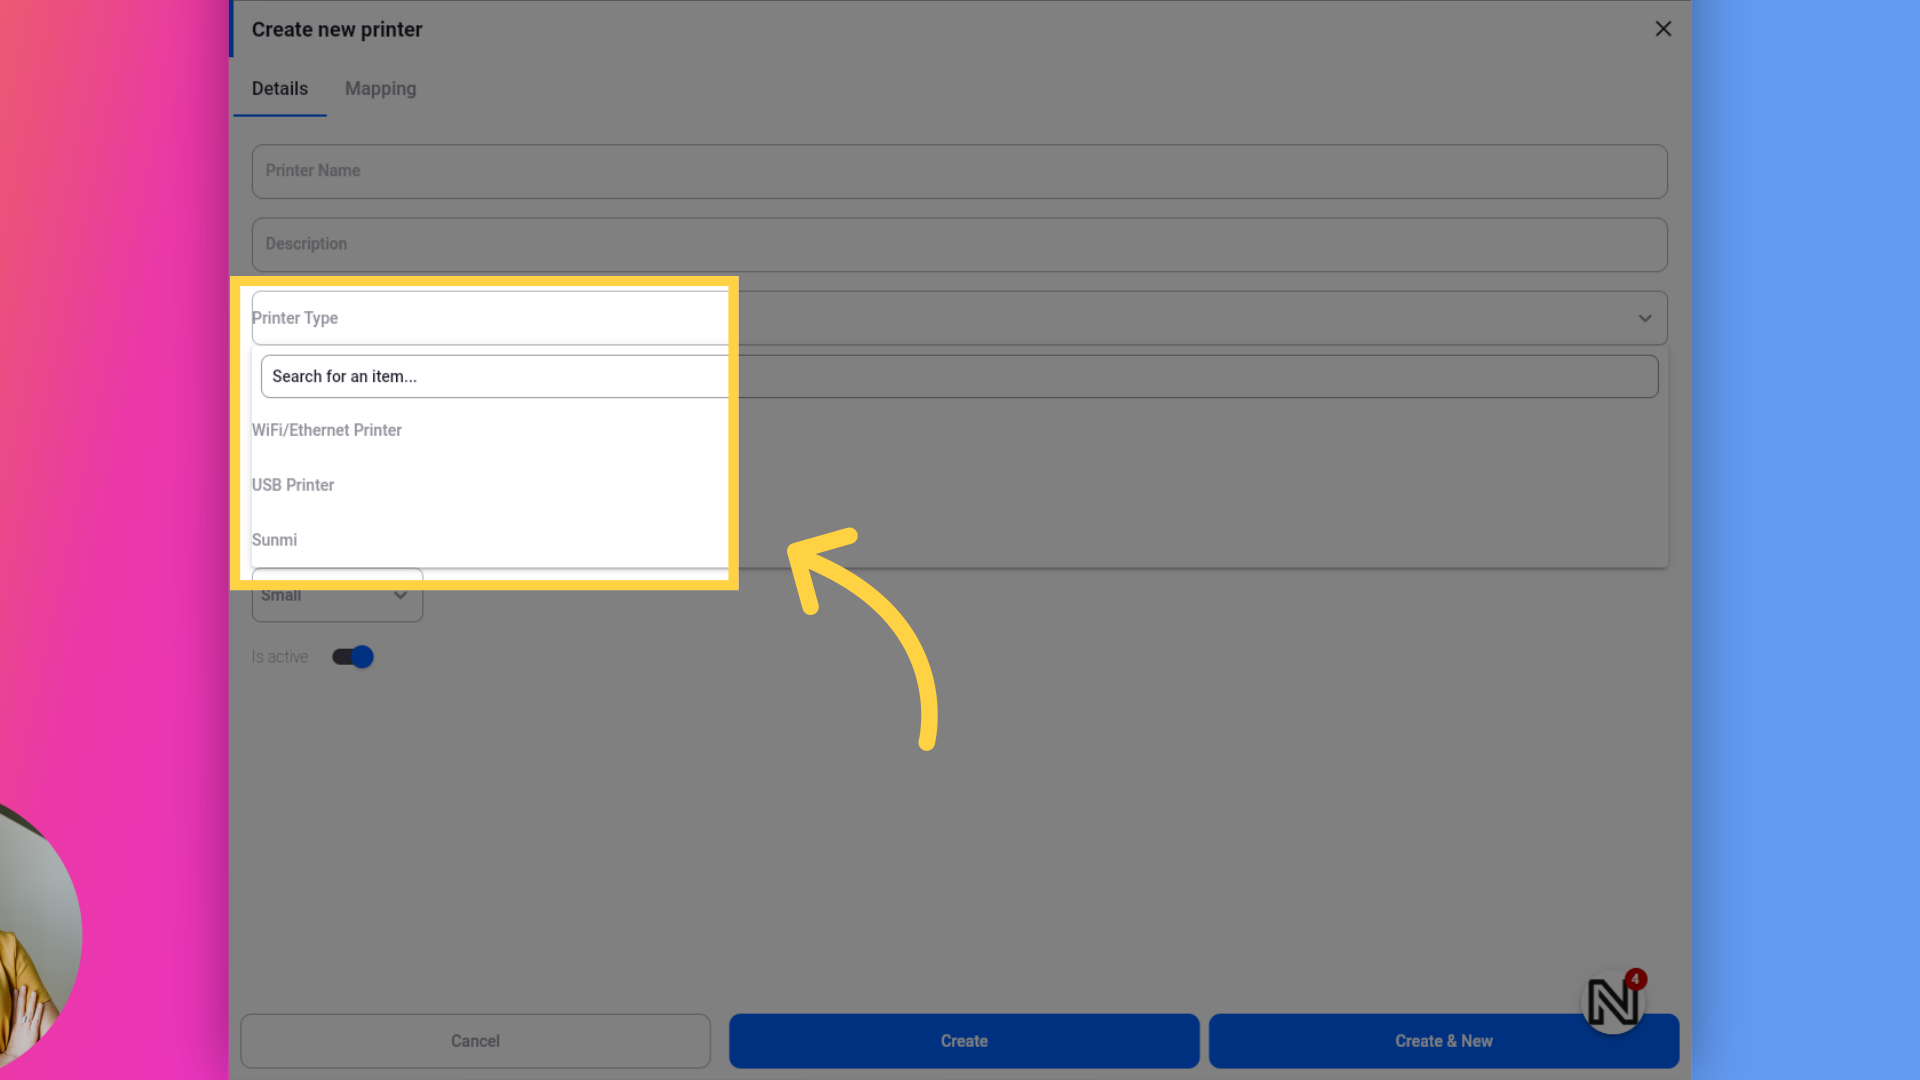
6. Printer Types & Compatible Printers
On the Printers page, there are three types of compatible printers or drivers that you can use to print bills or tickets: WiFi/Ethernet (using TCP/IP), USB Printer, and Sunmi Internal/External Printer.
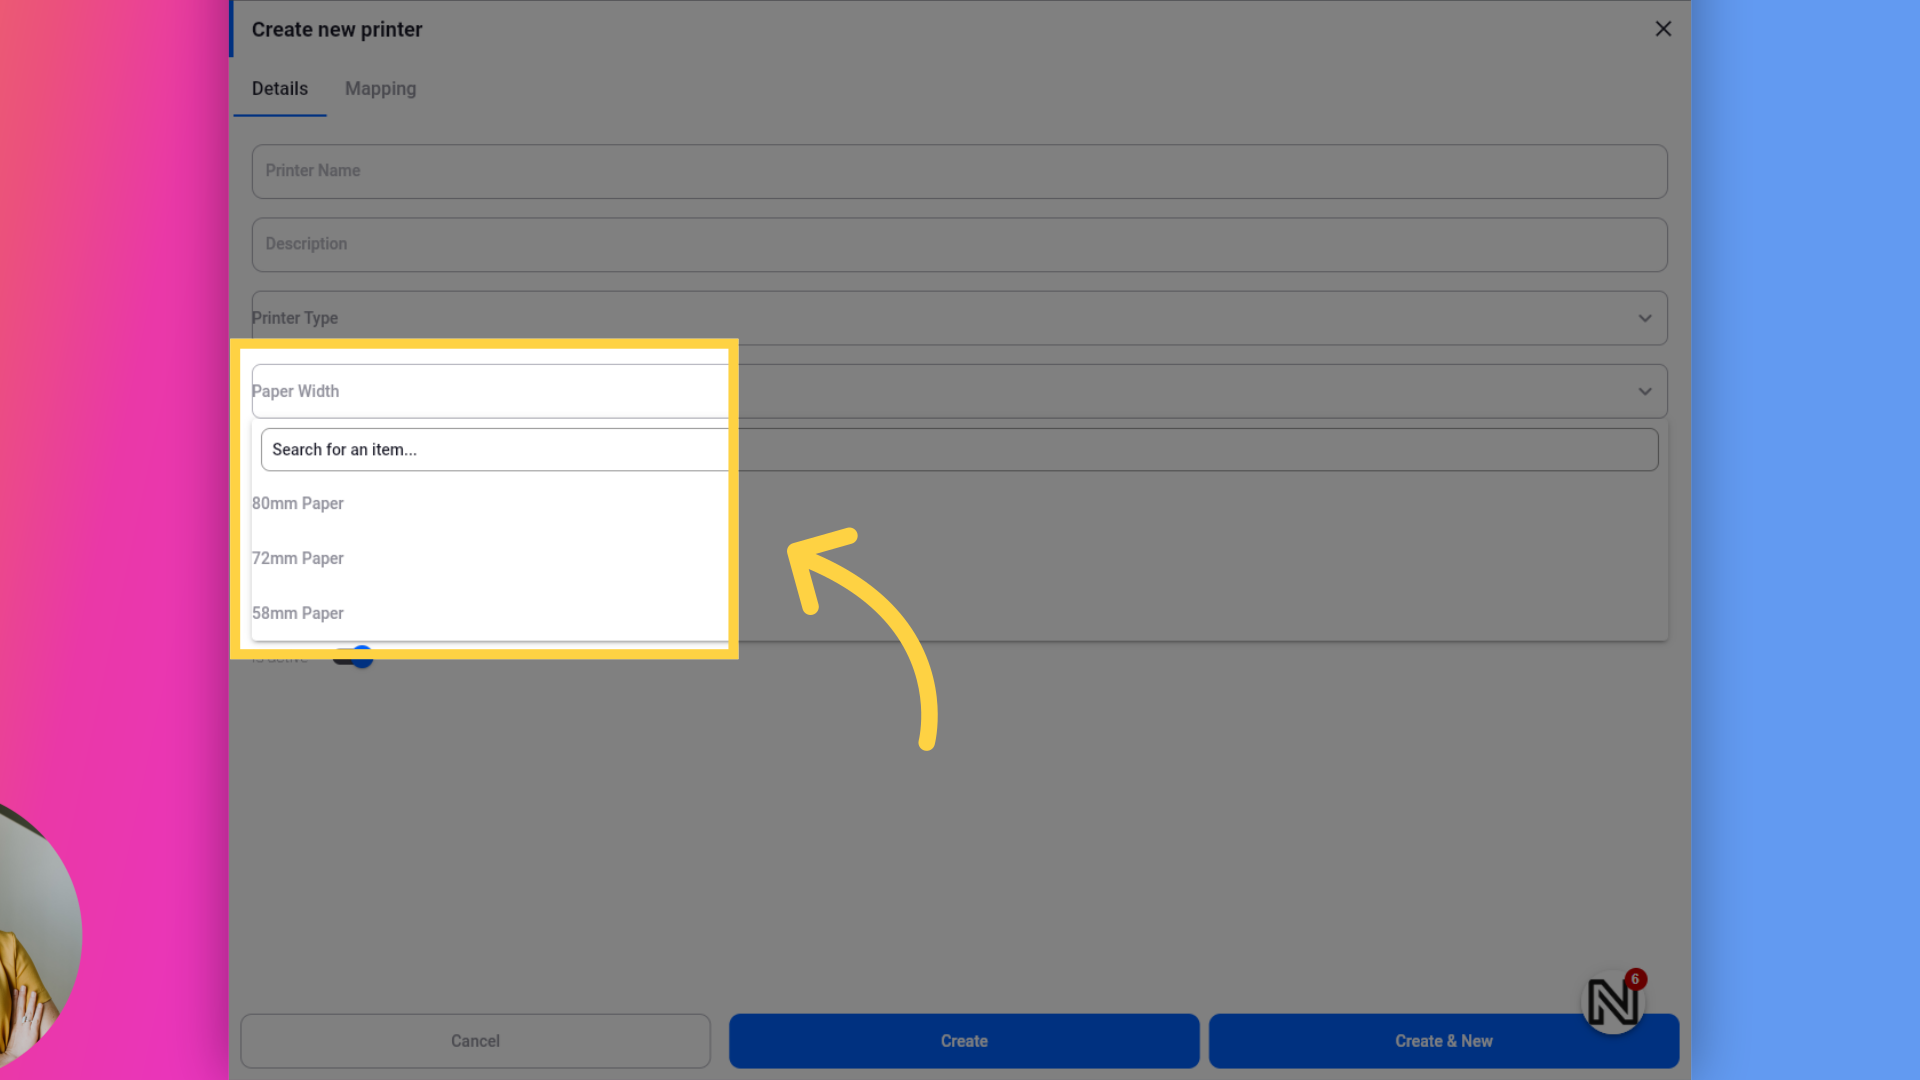
7. Printer Paper Sizes
There are three types of printer paper sizes compatible with our kitchen and bill ticket templates: 58mm, which is usually for the Sunmi V2 Mobile Terminal, and 72mm and 80mm, which are typically for thermal receipt printers.
8. Printing Templates (Bill or Kitchen)
There are two print templates available as standard. The Bill Ticket Template is designed for customers and shows products with pricing and the total of the bill. The Kitchen Ticket Template is designed for chefs in the kitchen and displays products in a larger font but without pricing or totals.

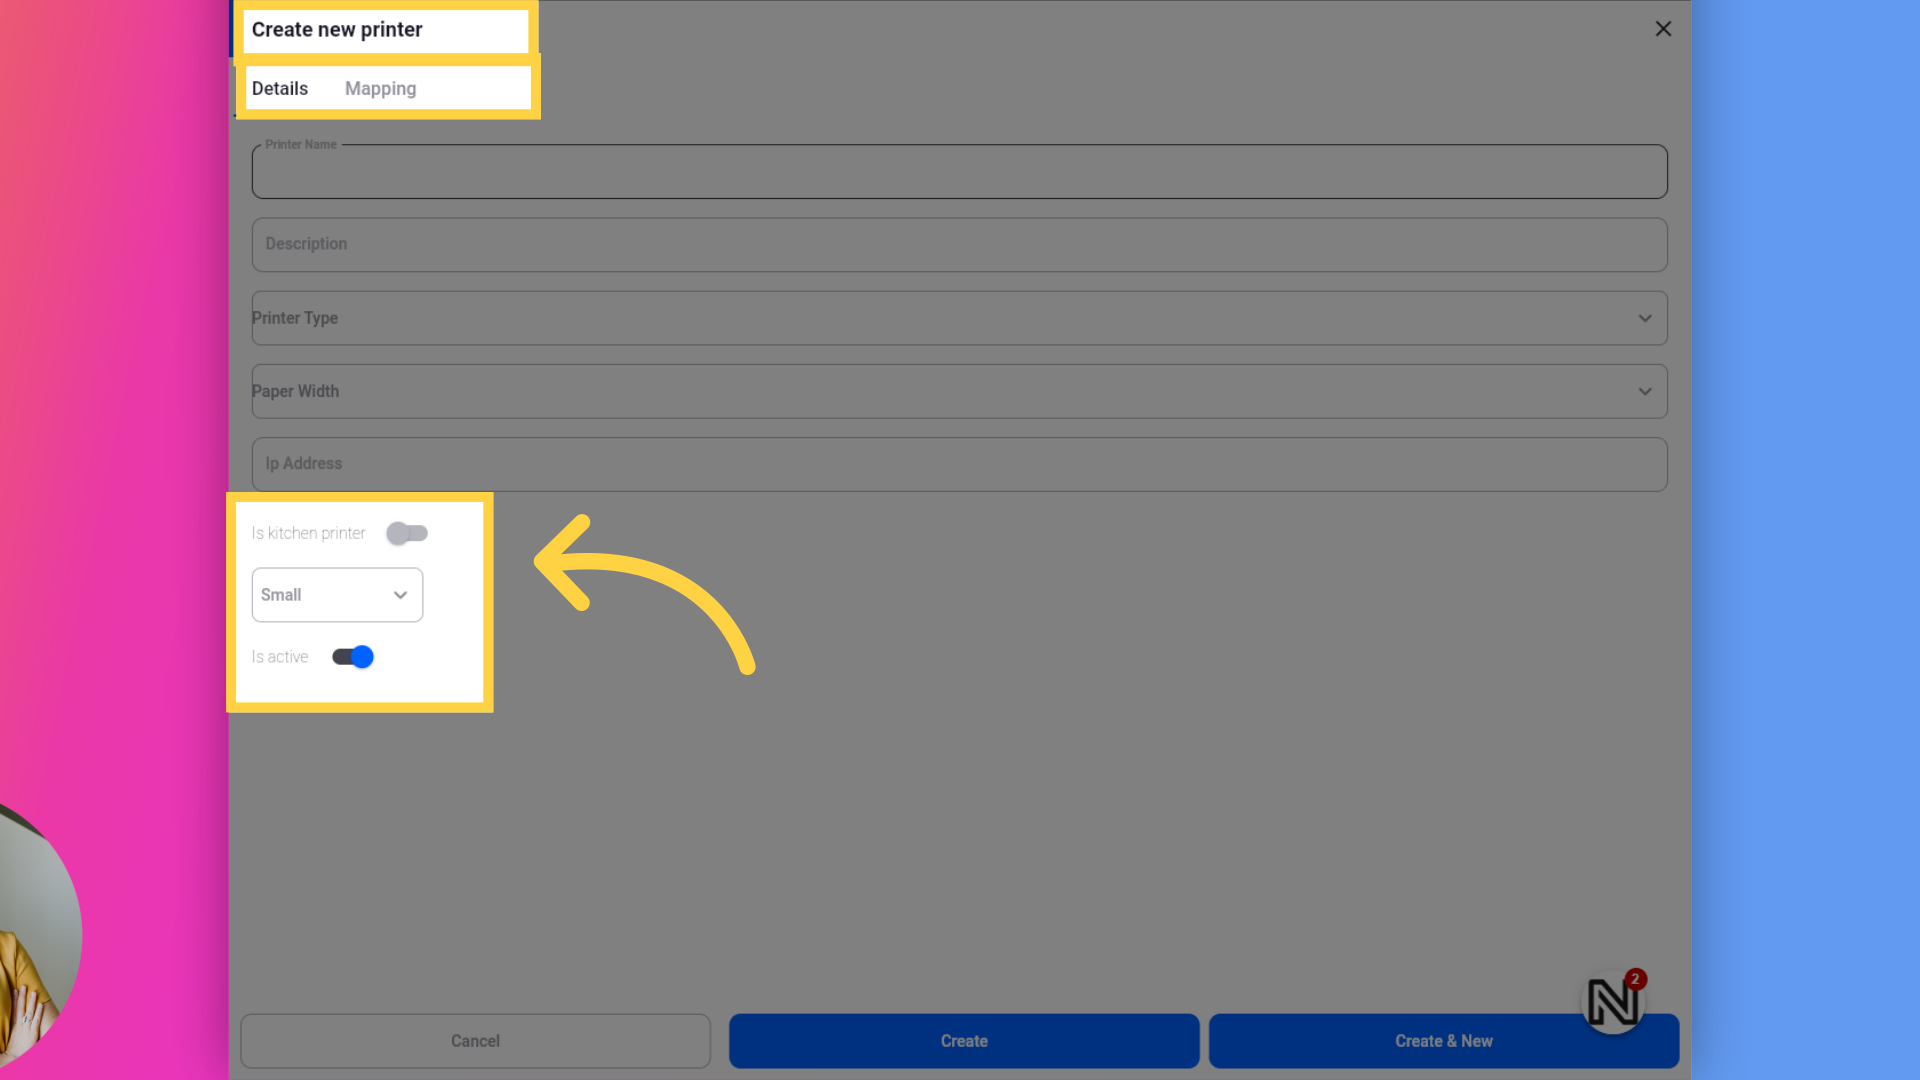
9. Other Printer Settings
To select which printing template to use, the “Is Kitchen Printer” option determines the template. If this setting is on, the printer uses the Kitchen Ticket Template. If it is off, the printer uses the Bill Ticket Template. The “Small or Large” setting adjusts the template font size, making it bigger or smaller. The “Is Active” option enables or disables the printer.
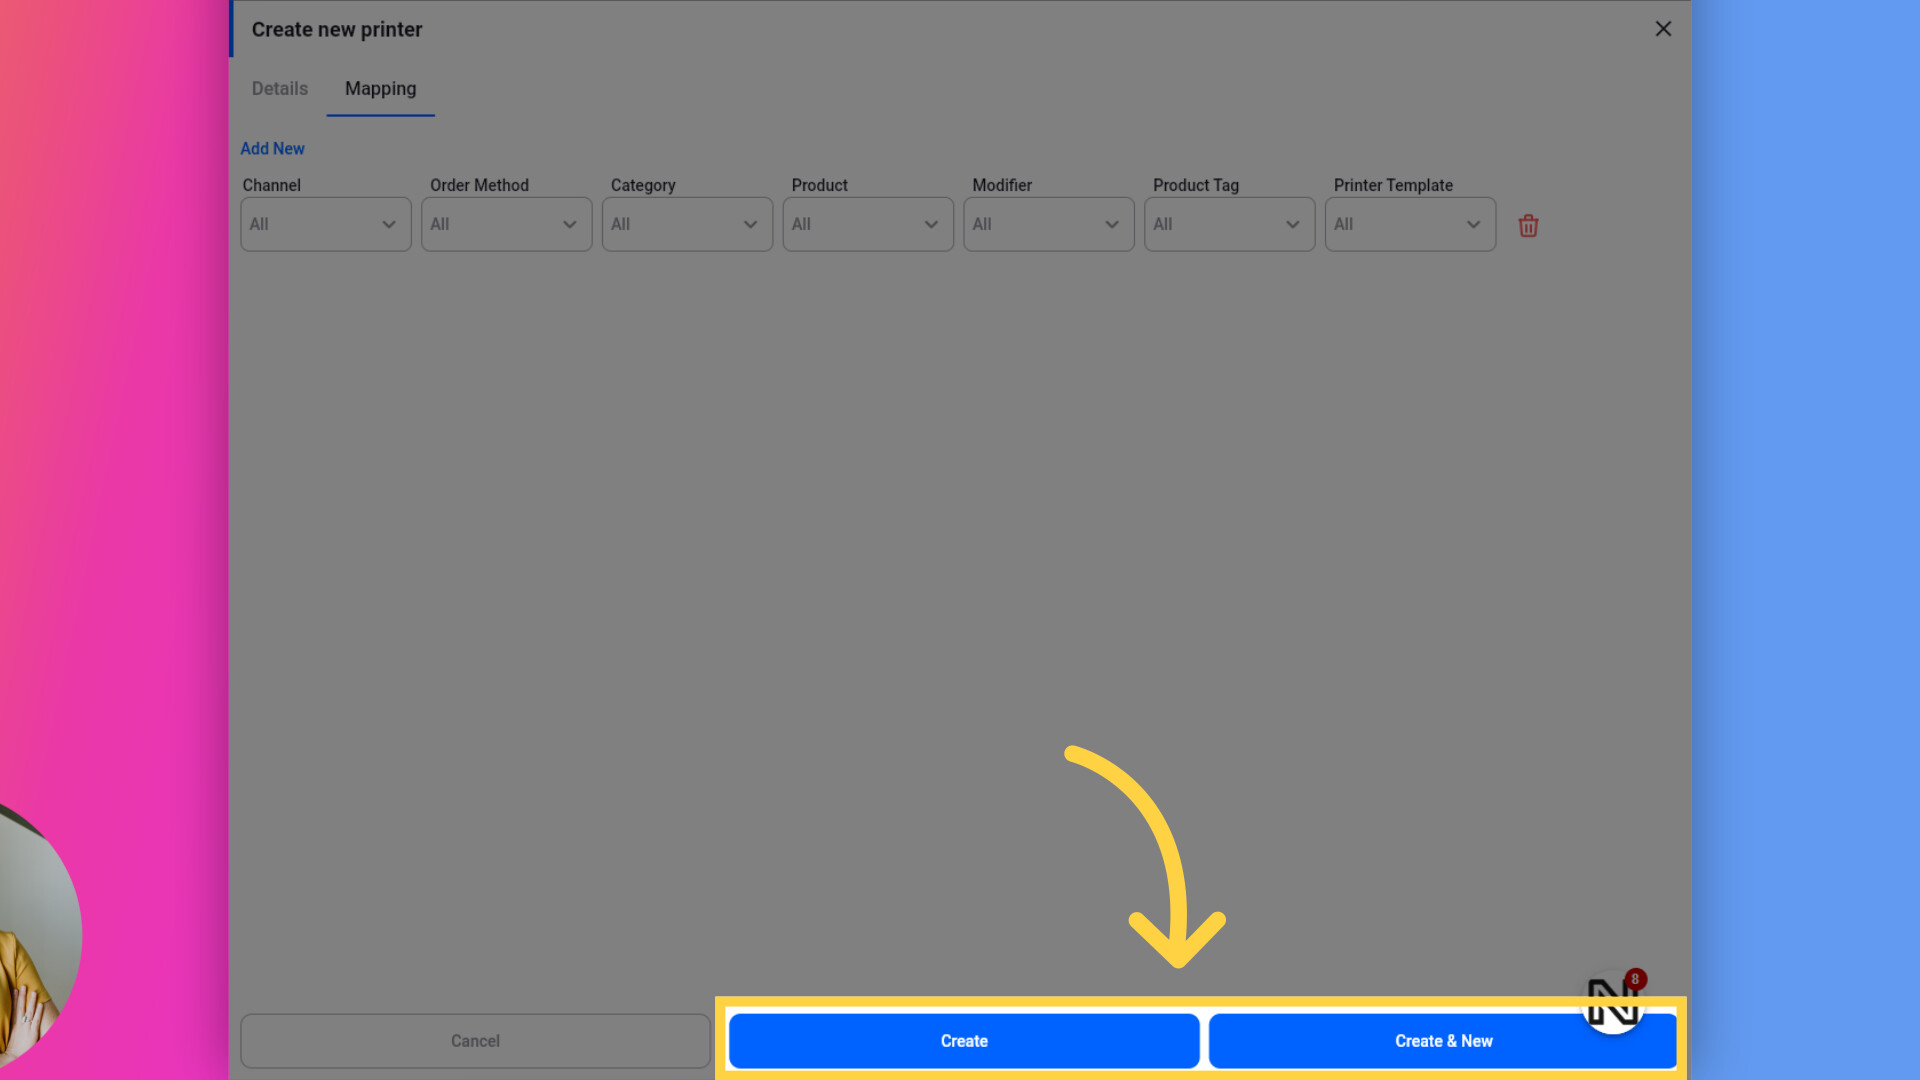
10. Printers Mapping
The Printer Mapping tab is where you assign which Sales Channels, Order Methods, Categories, and Products can use the printer for kitchen and bill tickets. You can add multiple rules (rows) with your desired configurations as needed.
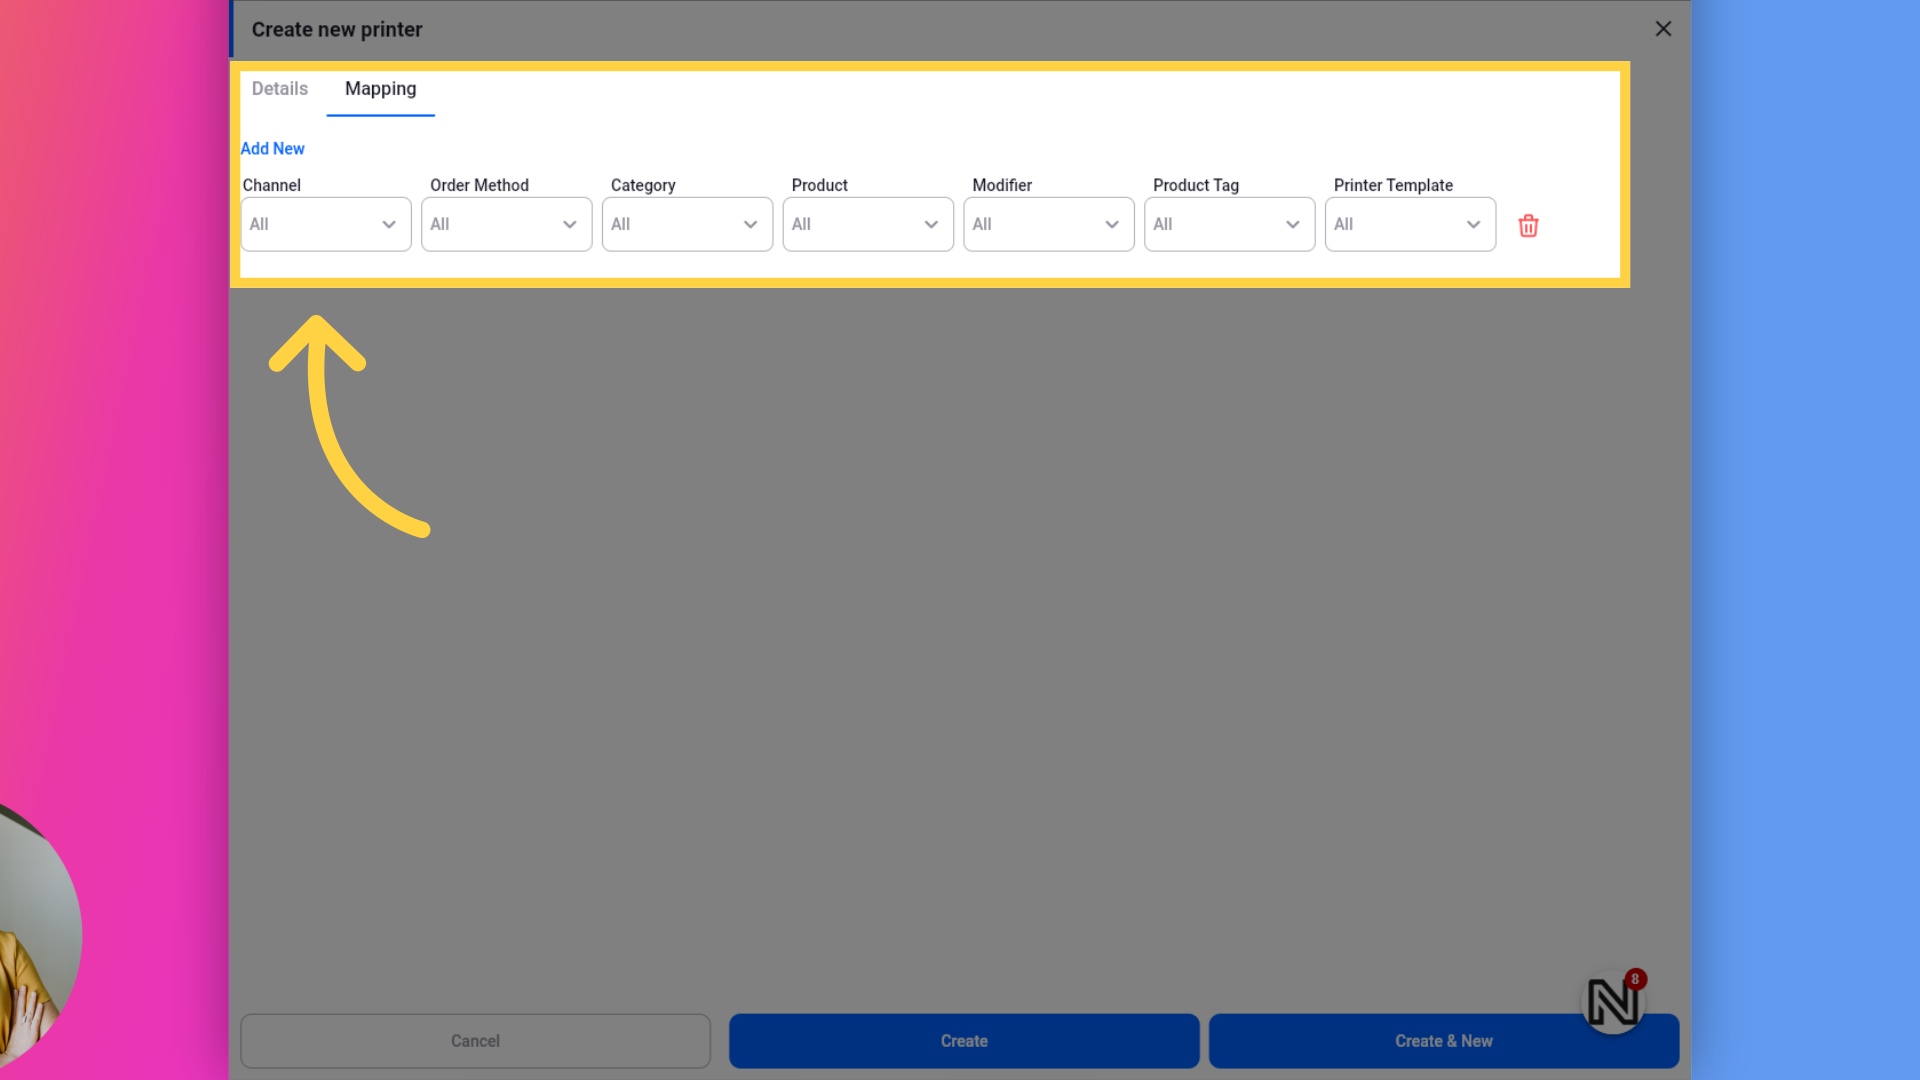
11. Create Printers Mapping
After you configured the Printer Mapping, Click the [Create New] button if you would like to create another Printer and stay on the same page. If not, click the [Create] button to save and close the window, returning to the Printers list page.
You’ve successfully mastered creating Printers on the Netron Restaurant Platform. Don’t hesitate to reach out to our supportive Takeaway Owners community on https://community.netroneats.com